45
Network Basic Page
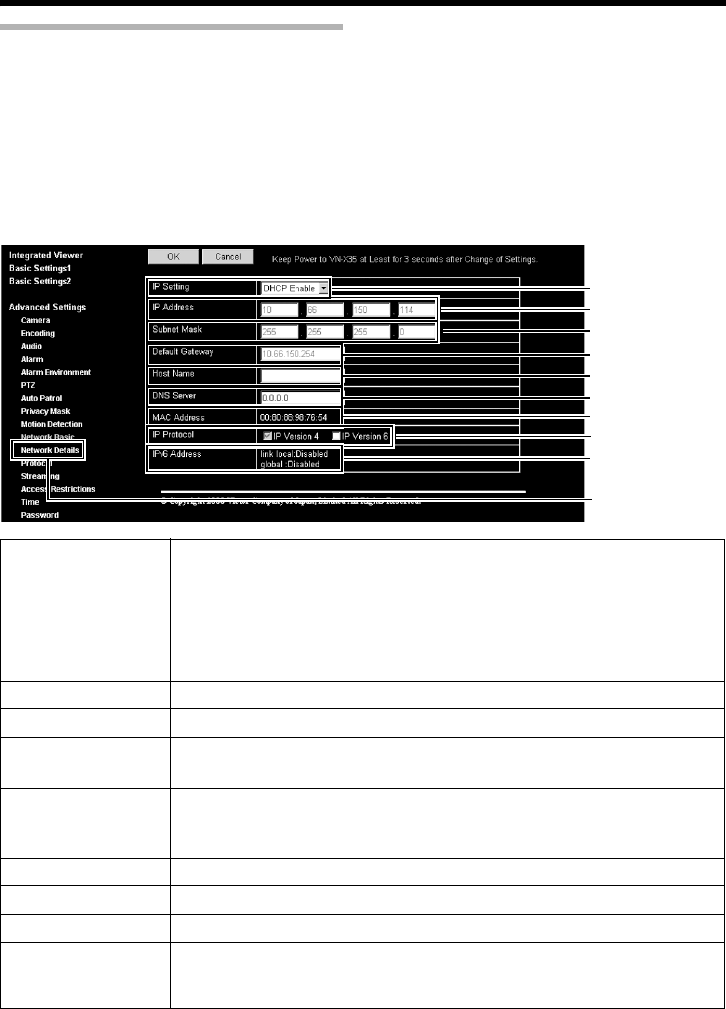
This page is for performing basic setting related to the network.
This page can be used during access using AadminB.
● Click [Advanced Settings] to display setting menu.
● Click Network Basic .
● Press the [OK] button to enable the new settings.
● If the [OK] button is pressed upon entering an invalid value, a warning message will appear and the
entry will be denied. Press the [Cancel] button to restore the invalid entry to the current value.
● When settings of the [Network Basic] page is changed, all services that are currently running will
end immediately. For example, when changes are made to the [Network Basic] page during JPEG/
MPEG4 distribution, distribution will be discontinued and TCP will be disconnected.
Click
A IP Setting For setting the DHCP client function.
Connect the camera to a network environment with a DHCP server when
DHCP is to be enabled.
If the DHCP server does not exist when DHCP is set to AEnableB, Camera
will start running with the 192.168.0.2 IP address and 255.255.255.0 subnet
mask in about 2 minutes after startup.
Refer to AIP Address SettingsB (A Page 6) for the IP address.
B IP Address For setting the IP address of the camera.
C Subnet Mask For setting the subnet mask of the camera.
D Default Gateway For setting the default gateway of the camera.
Set as 0.0.0.0 when a default gateway is not set.
E Host Name For setting the host name of the camera.
Specify a name using alphanumeric characters, hyphen (-) or period (.).
Underscores (_) cannot be used.
F DNS Server For setting the address of the DNS server.
G MAC Address The MAC address of the camera is displayed in a hexadecimal number.
H IP Protocol For setting IPv6 to On or Off. (IPv4 is set to On at all times.)
I IPv6 Address Two types of addresses, “link local” and “global”, are displayed when IPv6
settings are enabled. However, if the connected network does not support
IPv6, “Disabled” appears in the “global” address field.
