34 EN
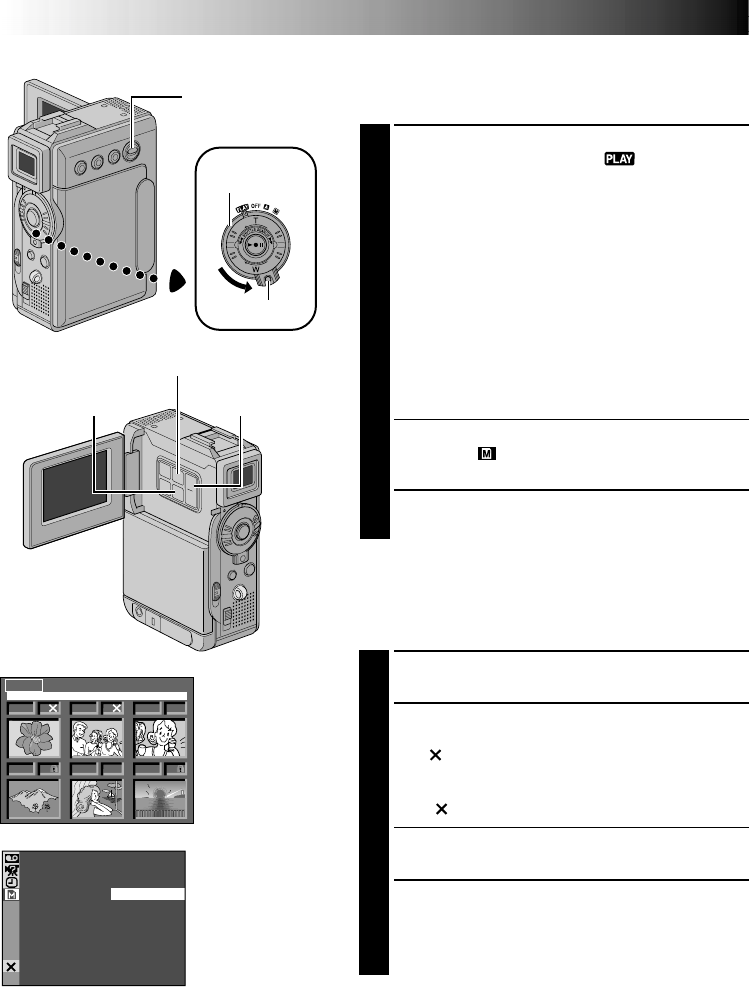
1 F 2 S
3 S
5 F
4 F 6 F
DELETE
EXIT
SE ECTL
EXE
CUTE
– CANCEL
DELE ET
Deleting Files
Previously stored files can be deleted either one at a
time or all at once.
1
Set the VIDEO/MEMORY Switch to “MEMORY”,
then set the Power Switch to “ ” while pressing
down the Lock Button located on the switch. Open
the LCD monitor fully or pull out the viewfinder
fully.
•A stored image file is displayed.
To delete the image file . . .
… go to step 2.
To delete the video clip file. . . .
… Press SET/SELECT once to engage the video clip
mode. “E-CLIP” appears. Then go to step 2.
To delete the sound effect file. . . .
… Press SET/SELECT twice to engage the sound
effect mode. “D.SOUND” appears. Then go to
step 2.
2
Press MENU. The Menu Screen appears. Press + or
– to select “ MEMORY” and press SET/SELECT.
The MEMORY Menu appears.
3
Press + or – to select “DELETE” and press SET/
SELECT. The Sub Menu appears.
TO SELECT A FILE BY BROWSING FILES
STORED IN MEMORY
Before doing the following, perform steps 1 through 3
above.
4
Press + or – to select “SELECT” and press SET/
SELECT. The DELETE Index Screen appears.
5
Press + or – to move the green frame to the desired
file that you wish to delete and press SET/SELECT.
An “ ” appears above the selected file.
Repeat this procedure for all files that you wish to
delete. To deselect a file, press SET/SELECT again.
The “ ” disappears.
6
Press + to select “EXIT” and press SET/SELECT. The
Deletion Confirmation Screen appears.
7
Press + or – to select “EXECUTE” and press SET/
SELECT. The selected files are deleted and the
normal playback screen appears.
•To cancel deletion, press + or – to select
“CANCEL” and press SET/SELECT.
NOTES:
●
Protected files (
੬
pg. 33) cannot be deleted with the
above operation. To delete them, remove protection
first.
●
Once files are deleted, they cannot be restored.
Check files before deleting.
Display
DELETE Index
Screen
D.S.C. PLAYBACK
(cont.)
Deletion
Confirmation
Screen
Power Switch
MENU Button
Lock Button
VIDEO/MEMORY
Switch
SET/SELECT
Button
+, – Button
