


8
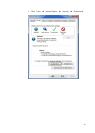
Please check the items in accordance with the list on the warranty card. Finally
you can remove the protective film of the camera.
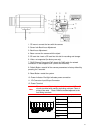
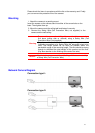
Mounting
1. Attach the camera to a pending mount.
Insert the screws on the camera stand into either of the screw holes on the
base. Then tighten them up.
2. Mount the camera onto the ceiling/wall and fasten it securely.
3. Connect the Safety Wire (Fall Prevention Wire, not supplied) to the
camera and the wall/ceiling.
To prevent the camera from falling off, ensure that it is connected to a
firm place (ceiling slab or channel) using a Safety Wire (Fall
Prevention Wire is not supplied).
Warning
Pay also careful attention to the length, strength, wiring, and material
(insulating properties) of a Safety Wire (fall prevention wire) to be
used. The length should be as short as possible within the
permissible range of the mounting length. The wire should be strong
enough to withstand the total weight of this product and the fixer.
(Pay also attention to the finishing at the end of the wire.)
Caution
Must be isolated camera and the wall/ceiling which are connected by
a Safety Wire (Fall Prevention Wire).
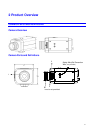
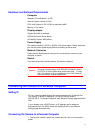
Network Camera Diagram
Connection type1:
Connection type 2: