8
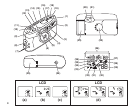
LOADING THE FILM
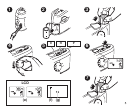
1. Turn the film-door latch (8) to the “open” position.
2. Insert the film cassette completely into the film chamber
➌
. Do not force the film
cassette into the film chamber.
3. Close the film door (25) to start the auto-film advance. The LCD panel (15) shows
the number of exposures (b).
NOTE: After you close the safety-interlock film door, you cannot open the film
door until the film is completely rewound into the film cassette.
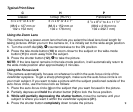
TAKING PICTURES
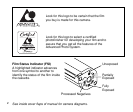
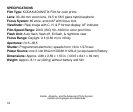
You can take Classic (C), HDTV (H), and Panoramic (P) pictures on the same film
cassette. Your photo-processing cost will be based on the format sizes(s) that
you use to expose the film (see table on page 5).
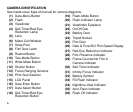
1. Turn the on/off dial (22),
➍
counterclockwise to the ON position.
2. Move the print-size selector (14),
➎
to the desired format (C, H, or P).
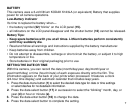
3. Look through the viewfinder eyepiece (21) and place the auto-focus circle (g) on
the subject. For a sharp picture, stand at least 2 ft (0.60 m) from your subject.
When your subject is closer than 2.6 ft (0.8 m) with the lens in the 30 mm position,
or closer than 5 ft (1.5 m) with the lens in the 60 mm position, compose your
picture using the close framing guide (f) in the viewfinder
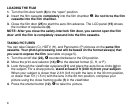
4. Press the shutter button (12),
➏
to take the picture.