


MANUAL
OVERVIEW
MANUAL
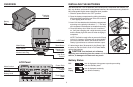
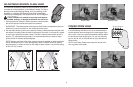
LCD Panel
Mode function
Auto OK
Battery Level
Power Ratio
Zoom Focal
Length
Flash Range
Scale
Battery
Door
Hot Shoe
Contact
Flashtube
Housing
Mode Button
Power Switch
LCD Panel
Zoom Button
Ready Light/
Test Button
Knurled Lock Ring
3
INSTALLING THE BATTERIES
The flash uses two 1.5V AA batteries (not included) and is compatible with alkaline, Ni-
MH, oxy-alkaline, and most AA rechargeable batteries. We recommend using Kodak Ni-
MH rechargeable digital camera batteries when possible.
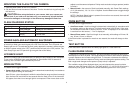
1. Slide the power switch to the “OFF” position.
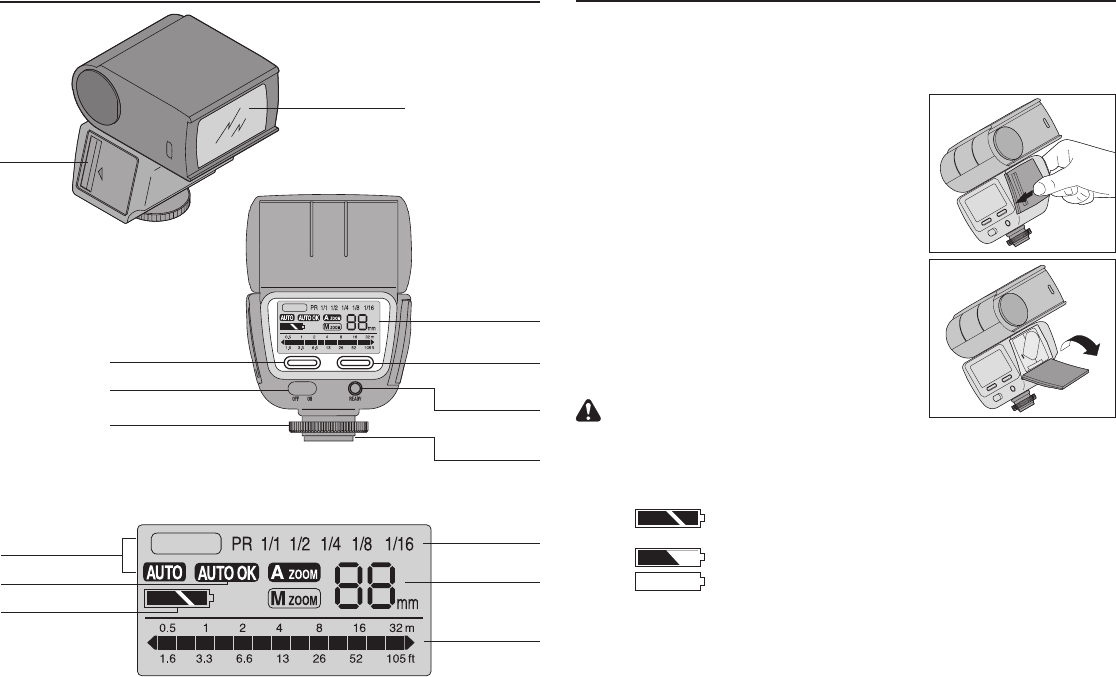
2. Open the battery compartment by sliding the battery
door back slightly toward the rear of the unit to unlatch
it, then flipping down the door.
3. Insert 2 AA size batteries into the battery compartment
according to the polarity indications “+ –”. The flash
will not operate if the batteries are installed incorrectly.
4. Close the battery door. When the unit is switched
on, it will start charging with a slight humming sound
and the Ready Light will come on when charging is
completed.
NOTE: The flash is ready to fire as soon as the Ready
Light is lit. However, full power will not be available
for several seconds. Wait a few seconds after the
Ready Light activates to achieve maximum output.
If it takes longer than 30 seconds for the Ready Light
to come on after the flash is fired in Full Power Mode,
replace the batteries.
CAUTION Turn the flash unit off before
mounting on or detaching from the camera. If it is turned on, the flash unit may
self-fire, or damage to the flash unit may result.
Battery Status
Full Icon is displayed during power-up and upon waking
from the Standby state.
Low Icon is displayed constantly.
Empty Icon blinks constantly.