


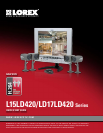

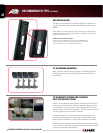

L15LD420/L17LD420 Series Quick Set-Up Guide R1
4
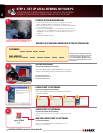
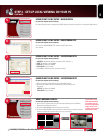
1. Access the Main Menu Setup screens, and navigate to the MAIN
MENU - EXTERNAL DEVICE - TCP/IP SETUP - IP SETUP option.
2. Record the MAC Address of your system. This information is NECESSARY
for the DDNS Setup process.
3. Confirm that the DHCP MODE is set to AUTOMATIC. This will allow your
system to lease an IP ADDRESS from your router. If the system is not set to
AUTOMATIC, change the setting in the DHCP SETUP menu and click
DETECT IP.
4. The IP PORT is 50000 by default.
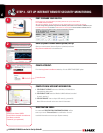
STEP 2 - SET UP LOCAL VIEWING ON YOUR PC
RETRIEVE SYSTEM INFORMATION:
RECORD THE IP AND MAC ADDRESSES IN THE SECTION BELOW:
*YOUR SYSTEM MUST BE CONNECTED TO
A ROUTER PRIOR TO POWERING IT ON.
IP ADDRESS: . . .
MAC ADDRESS:
(Required for DDNS registration)
NOTE: The system will lease networking
information from your Router. If you wish
to set your information manually, then
set the DHCP MODE to MANUAL. Please
consult your Hardware Manual for further
Menu options.
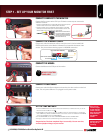
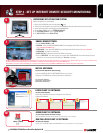
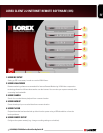
Insert the LOREX CLIENT 2.2 SOFTWARE CD into your local
computer’s CD ROM drive and proceed with the installation.
INSTALL SOFTWARE:
(on your local computer for local viewing)
Follow the installation screens to complete Lorex Client 2.2
Software installation.
LOREX CLIENT 2.2 SOFTWARE:
(on your local computer for local viewing)
For Lorex Client Software
requirements, please refer to
the Software User Manual.
1
2 3 4 5
1
2
3
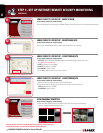
Close the CD Menu Screen. A Lorex Client Icon will appear on your
desktop.
LOREX CLIENT 2.2 SOFTWARE:
(on your local computer for local viewing)
Double-click the LOREX CLIENT 2.2 SOFTWARE icon on your
desktop to run the program.
RUN THE LOREX CLIENT 2.2 SOFTWARE:
(on your local computer)
4
THIS STEP RELATES TO REMOTE VIEWING OVER THE LAN (LOCAL AREA NETWORK)
BY USING A PC LOCATED ON THE SAME NETWORK AS THAT OF THE SYSTEM.