


29
3. Highlight Ulead Photoexpress 4.O My Custom Edition on the
list and click Add/Remove - and confirm complete removal of
Ulead Photoexpress.
4. Insert the installation CD in to the CD-ROM drive. Click “Exit”
when the installation menu appears. Go to “My Computer” and
right-click on your CD drive and click “Open”. Double click on
the folder ‘OTHER’ and double-click on the folder
‘DIRECTX8.0’. Then double click on ‘SETUP.EXE’ and
Microsoft’s DirectX will install automatically.
If you prefer, you may also download and install DirectX 8.0
from Microsoft on the Internet at:
http://www.microsoft.com/downloads/release.asp?ReleaseID=27741
5. Restart your computer.
6. Insert the B350 installation CD. When the menu appears, go to
the next step.
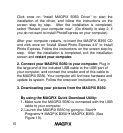
7. Click "Install MAGPiX B350 Driver ", and complete the
installation. Click "Finish". (If a "Welcome" window displays,
select "Repair" and click "Next".)
8. When "InstallShield Wizard Complete" displays, select "Yes"
and click "Finish" to restart system.
9. Connect the B350 with USB port of your PC. Wait 45 seconds.
Windows should build a new driver database.
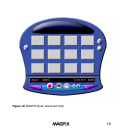
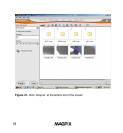
10. Go to Start--> Programs -->Magpix B350 --> Magpix B350.
When the window opens, click on the red camera icon to
download your photos. To save the pictures you've just
downloaded, click on the disk icon. To enlarge the pictures,