Remote Operation Software (DX-PC For View)
21
NOTE: When using DVRNS server, place a checkmark in the Use DVRNS box. The IP Address field will
be changed to DVR Name, and you can enter the name of remote site registered on the DVRNS server.
The DVR name you enter should match the name set during the DVRNS setup on the remote DVR.
– Login Setup: Enter the user ID and password of the remote site to be accessed. If you have entered
a user ID and a password, the site will be connected automatically without a dialog box requesting a
password. Select No Password for remote systems that do not require a password (e.g., guest login).
NOTE: Up to 32 characters may be used for the site names, telephone numbers and user IDs, and
up to 8 characters may be used for passwords.
– Emergency Event Instruction: Enter the message to display when emergency events are called in
from the remote site. The Emergency Event Instruction can be checked by clicking the right mouse
button after selecting the event or the site from the list in the Emergency Event panel.
Change: Select the group or site you want to change and click the Change button, or double click the
group or the site to change. Then, edit the site information.
Remove: Select the group or site you want to remove and click the Remove button.
List All: Displays all registered remote sites.
Find: Enter the group name or site name to search for and click the Find button to display the matching
groups or sites in the list.
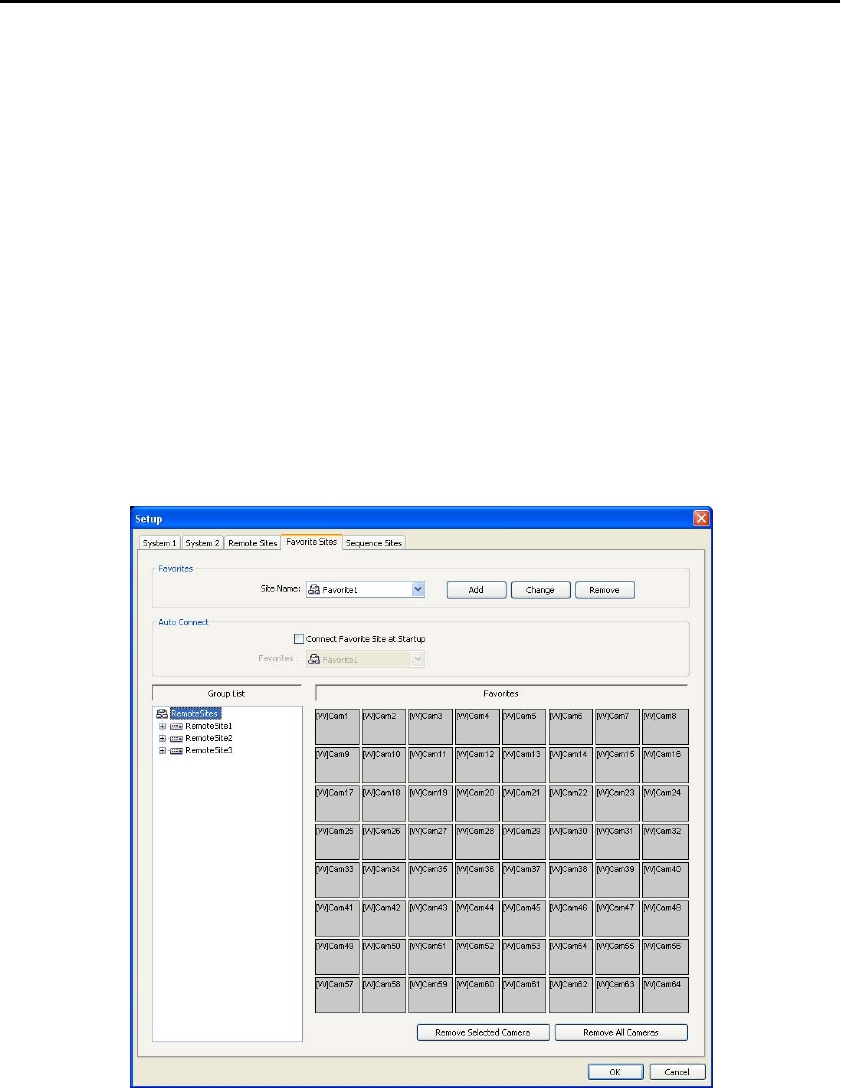
Favorite Site: The Favorite Site is a user-defined connection list that combines more than one remote
site, so multiple sites can be monitored at the same time with a single connection. Add a new Favorite Site
and define it by dragging and dropping sites and/or cameras to the Favorites map. Up to 64 cameras can
be monitored at a time when each camera is assigned to its own position on the Favorites map.


