134
Using ViewNX 2
Copy Pictures to the Computer
Before proceeding, be sure you have installed the software on the supplied ViewNX 2
CD (0 132).
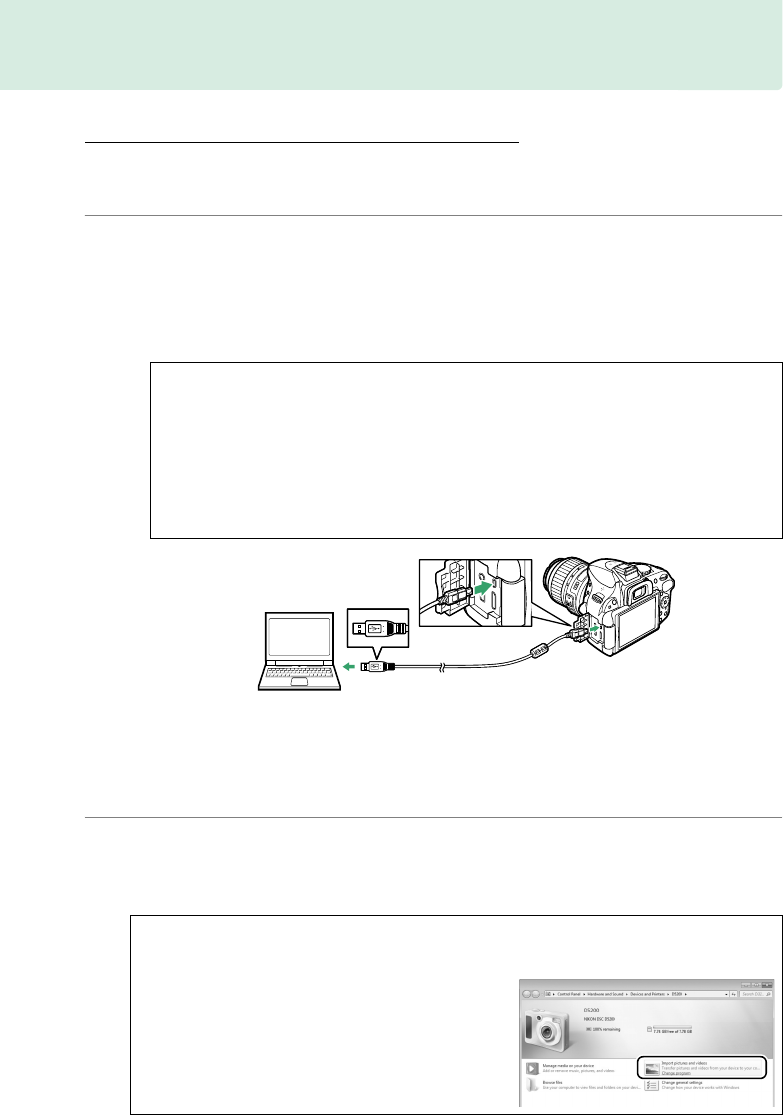
1 Choose how pictures will be copied to the computer.
Choose one of the following methods:
• Direct USB connection: Turn the camera off and ensure that the memory card is
inserted in the camera.
Connect the camera to the computer using the
supplied UC-E17 USB cable and then turn the camera on.
• SD card slot: If your computer is equipped with an SD card slot, the card can be
inserted directly in the slot.
• SD card reader: Connect a card reader (available separately from third-party
suppliers) to the computer and insert the memory card.
2 Start Nikon Transfer 2 component of ViewNX 2.
If a message is displayed prompting you to choose a program, select
Nikon Transfer 2.
A Use a Reliable Power Source
To ensure that data transfer is not interrupted, be sure the camera EN-EL14 battery
is fully charged.
If in doubt, charge the battery before use or use an EH-5b AC
adapter and EP-5A power connector (available separately).
A USB Hubs
Connect the camera directly to the computer; do not connect the cable via a USB
hub or keyboard.
A Windows 7
If the following dialog is displayed, select Nikon Transfer 2 as described below.
1 Under Import pictures and videos, click
Change program.
A program selection dialog
will be displayed; select Import File using
Nikon Transfer 2 and click OK.
2 Double-click Import File.


