


138
Printing Pictures One at a Time
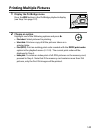
1 Select a picture.
Press 4 or 2 to view additional pictures.
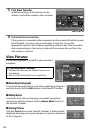
Press the X
button to zoom in on the current frame (0 125; press K to
exit zoom).
To view six pictures at a time, press the W (Q)
button.
Use the multi selector to highlight pictures, or
press X to display the highlighted picture full frame.
2 Display printing options.
Press J to display PictBridge printing options.
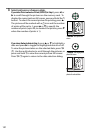
3 Adjust printing options.
Press 1 or 3 to highlight an option and press 2 to select.
Option Description
Page size
Highlight a page size (only sizes supported by the current printer are listed)
and press J to select and exit to the previous menu (to print at the default
page size for the current printer, select Printer default).
No.
of
copies
Press 1 or 3 to choose number of copies (maximum 99), then press J to
select and return to the previous menu.
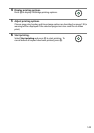
Border
This option is available only if supported by the printer.
Highlight Printer
default (use current printer settings), Print with border (print photo with
white border), or No border and press J to select and exit to the previous
menu.
Time
stamp
Highlight Printer default (use current printer settings), Print time stamp
(print times and dates of recording on photos), or No time stamp and press J
to select and exit to the previous menu.
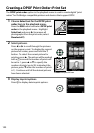
Cropping
This option is available only if supported by the printer.
To exit without
cropping, highlight No cropping and press J.
To crop the current picture,
highlight Crop and press 2.
A crop selection dialog will be displayed; press X to increase the size of the
crop, W (Q) to decrease.
Position the crop using the multi selector and press
J.
Note that print quality may drop if small crops are printed at large sizes.