E22
Reference Section
Connecting the Camera to a Printer
1 Turn off the camera.
2 Turn on the printer.
• Check printer settings.
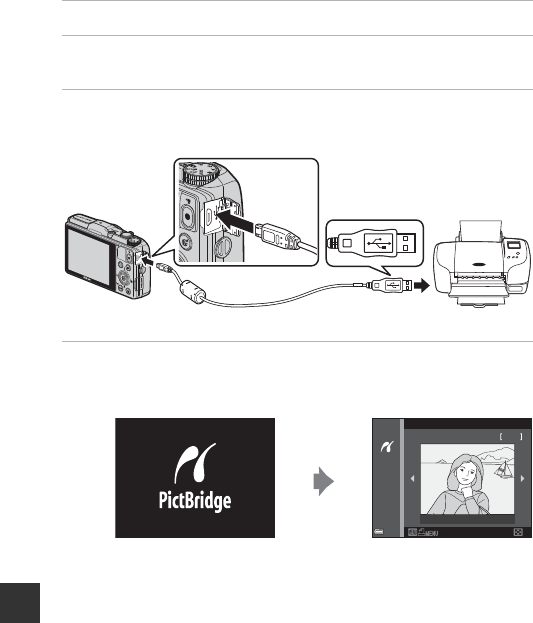
3 Connect the camera to the printer using the USB cable.
• Make sure that the plugs are properly oriented. Do not insert or remove the
plugs at an angle when connecting or disconnecting them.
4 The camera is automatically turned on.
• The PictBridge startup screen (
1
) is displayed in the camera monitor,
followed by the Print selection screen (
2
).
B If the PictBridge Startup Screen Is not Displayed
When Auto is selected for Charge by computer (E75), it may be impossible to
print images with direct connection of the camera to some printers. If the PictBridge
startup screen is not displayed after the camera is turned on, turn the camera off and
disconnect the USB cable. Set Charge by computer to Off and reconnect the
camera to the printer.
32
15/05/2014
Print selection
No. 32
12


