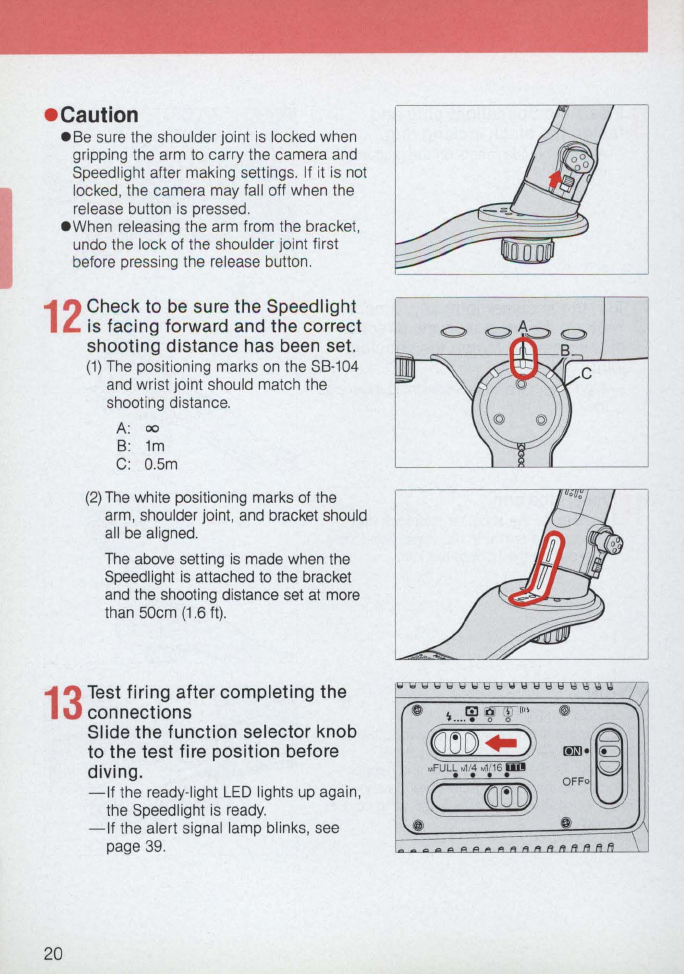
e Caution
_ Be sure the shoulder joint is locked when
gripping the arm to carry the camera and
8peedlight after making settings. If it is not
locked, the camera may fall off when the
release button is pressed.
-W
hen releasing the arm from the bracket,
undo the lock of the shoulder joint first
before pressing the release button.
12
Check to
be
sure the Speed light
is facing forward and the correct
shooting distance has been set.
(1)
The positioning marks on the 8B-104
and wrist joint should match the
shooting distance.
A:
00
B: 1m
C:
O.Sm
(2)
The white positioning marks of the
arm, shoulder joint, and bracket shou
ld
all be aligned.
The above setting
is
made when the
Speedlight is attached to the bracket
and the shooting distance set at more
than
SOcm
(1
.6 ft).
13
Test
firin.g after completing the
connections
20
Slide the function selector knob
to the test fire position before
diving.
-If
the ready-light LED lights up again,
the 8peedlight is ready.
-If
the alert signal lamp blinks, see
page 39.
...
.............
""""",,
......
,,'"
/
•
~
....
~
rr(U'
G
~
(]
~Q
..
~
~
@
MFULL
M1I
4
M1I
16
db
. . . .
~
~rJ~
OFFo
•
Il
_."
..
""""
\


