


65
Connecting to a Computer
Connecting to Televisions, Computers, and Printers
Transferring Pictures to a Computer
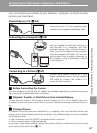
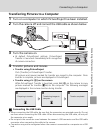
1 Turn on a computer to which PictureProject has been installed.
2
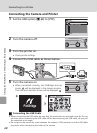
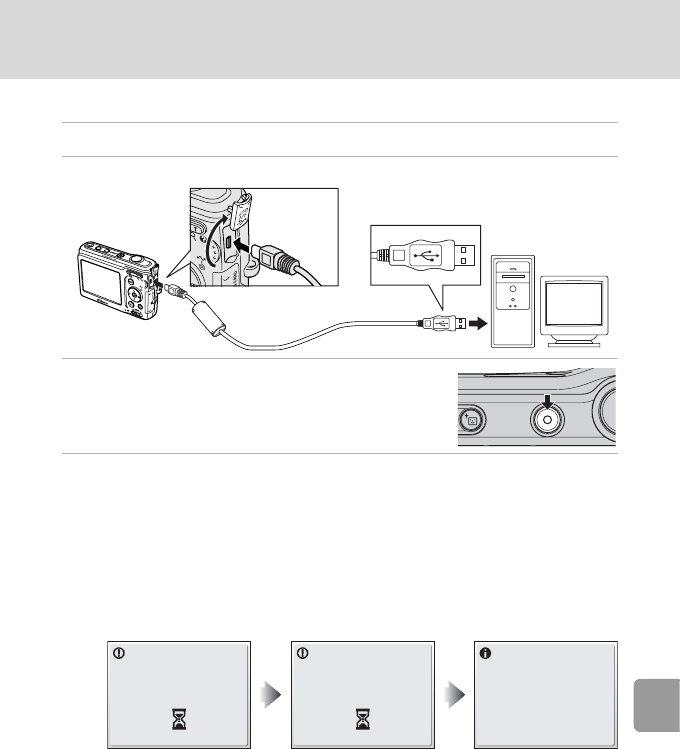
Turn the camera off and connect the USB cable as shown below.
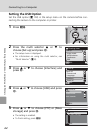
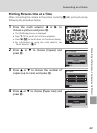
3 Turn the camera on.
• At default PictureProject settings, PictureProject
Transfer is launched immediately with recognition
of camera connection.
4 Transfer pictures and movies.
• Transfer using PictureProject
Click [Transfer] in PictureProject Transfer.
All pictures and movies marked for transfer are copied to the computer. Once
transfer is complete, pictures are displayed in PictureProject.
• Transfer using E (d) on the camera
While PictureProject Transfer is launched, press E (d) on the camera to copy
pictures marked for transfer (c 66) to the computer. The following messages
are displayed in the camera monitor during transfer.
j Connecting the USB Cable
• When connecting the USB cable, be sure that the connectors are oriented correctly. Do not
use force when connecting the USB cable. When disconnecting the USB cable, do not pull
the connector at an angle.
• Do not pinch the connector cover between the camera’s USB connector and the USB cable
connector when connecting the cable to the camera.
• Connection may not be recognized when the camera is connected to a computer via a USB
hub.
ON/OFF
Preparing to transfer.
Transfer completed.
Transferring images to
computer.