31
Using the Flash
Auto Mode
B Shooting When Lighting Is Poor and the Flash Is Disabled (W)
• Use of a tripod is recommended to stabilize the camera during shooting and avoid the effects of
camera shake.
• The E is displayed when the camera automatically increases sensitivity to minimize blur caused
by slow shutter speed. Pictures taken when E is displayed may be slightly mottled.
B Note on Using the Flash
When using the flash, reflections from dust particles in the air may appear as bright spots in pictures.
To reduce these reflections, set the flash to W (Off).
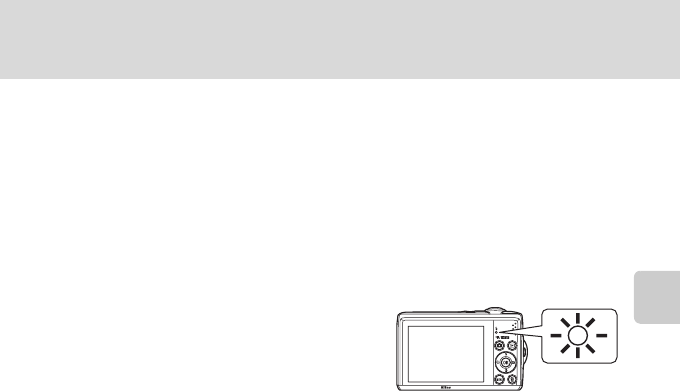
C The Flash Lamp
The flash lamp indicates flash status when the shutter-
release button is pressed halfway.
• On: Flash will fire when picture is taken.
• Blinks: Flash charging. Wait a few seconds and try
again.
• Off: Flash will not fire when picture is taken.
If the remaining battery level is low, the monitor will turn off until the flash has finished charging.
C The Flash Mode Setting
The default setting of the flash mode depends on the shooting mode.
• G (easy auto): U Auto
• Scene: varies with the selected scene mode (A35-42).
• F (smart portrait): U Auto
• A (auto): U Auto
Flash cannot be used simultaneously with certain features. ➝ “Camera Settings that Cannot Be Set
at the Same Time” (A 80)
When the shooting mode is A (auto) mode, the changed flash setting will be stored even if the
camera is turned off.
C Red-eye Reduction
This camera uses advanced red-eye reduction (“In-Camera Red-Eye Fix”).
If the camera detects “red-eye” when a picture is taken, Nikon’s own In-Camera Red-Eye Fix
processes the image before it is saved.
Note the following when taking pictures:
• The time required to save images increases slightly.
• Red-eye reduction may not always produce the desired results.
• In some rare cases, other portions of pictures may be affected. Use flash modes other than auto
with red-eye reduction in above cases.


