Using the Nokia Image Viewer
17
Copyright
© 2004 Nokia. All rights reserved.
Phone:
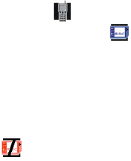
1. Your phone is switched on.
2. The Nokia Image Viewer is connected to your compatible phone’s Pop-Port
TM
.
Each time you connect a phone to the Nokia Image Viewer, a progress bar is
displayed on the TV while the images are transferred from the phone. While the
progress bar is displayed, pressing any of the buttons on the main unit or the
remote control will have no effect.
Nokia Image Viewer:
1. The Nokia Image Viewer is switched on and the Nokia logo is displayed on your
TV screen.
2. If you are using the remote control, it must be within a maximum of 7 meters
of the main unit and there must be no obstructions, between the IR ports of
the main unit and the remote control.
■ Selecting the memory
The icon at the left bottom corner of the TV screen shows which memory is
selected. The phone memory ( ) means that you can view the images in the
connected phone. The MMC memory ( ) means that you can view the images in
the MMC card inserted in the Nokia Image Viewer.
When you switch the Nokia Image Viewer on, it chooses phone memory by
default. If no phone is connected, the Nokia Image Viewer attempts to switch to
MMC memory. If no MMC card is inserted in the image viewer, and there is still no
phone connected, the icon is displayed.


