


94
Shooting Options: Shooting Menu (A, B, C, D Modes)
More on Shooting
Quick adjust
1
Adjust the sharpness, contrast and saturation levels automatically. Five levels of
adjustment are available from -2 to +2.
Choose from options between -2 and +2 to reduce or emphasize the effect of the
selected COOLPIX Picture Control.
The default setting is 0.
Image sharpening
Choose how much outlines are sharpened during shooting. Choose A (auto) to
adjust sharpening automatically, or choose from seven levels of adjustment between
0 (no sharpening) and 6. The higher the number, the sharper the picture, and the
lower the number, the softer the picture.
The default setting is 3 for Standard or Monochrome, 2 for Neutral and 4 for
Vivid.
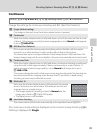
Contrast
Control the contrast. Choose A (auto) to adjust the contrast automatically according
to the type of scene, or choose from seven levels of adjustment between -3 and +3.
– makes it into an image with a softer appearance, and + gives it a harder
appearance. Choose lower values to prevent highlights in portrait subjects from
being “washed out” in direct sunlight, higher values to preserve detail in misty
landscapes and other low-contrast subjects.
The default setting is 0.
Saturation
2
Control the vividness of colors. Choose A (auto) to adjust saturation automatically
according to the type of scene, or seven levels of adjustment can be done by
choosing from values between -3 and +3.
Setting to the – side reduces the vividness, and setting to the + side increases the
vividness.
The default setting is 0.
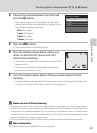
Filter effects
3
Simulate the effect of color filters on monochrome photographs. Choose from Off
(the default setting), Y (yellow), O (orange), R (red), and G (green).
Y, O, R:
Enhance contrast. Can be used to tone down the brightness of the sky in landscape
photographs. The contrast is strengthened in the order Y ➝ O ➝ R.
G:
Softens skin tones. Suitable for portraits.