


61
ADVANCED SHOOTING FEATURES
Using the Self-Timer
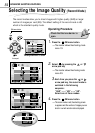
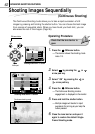
1/3
AUTO
OFF
OFF
OFF
END
OK
SELECT
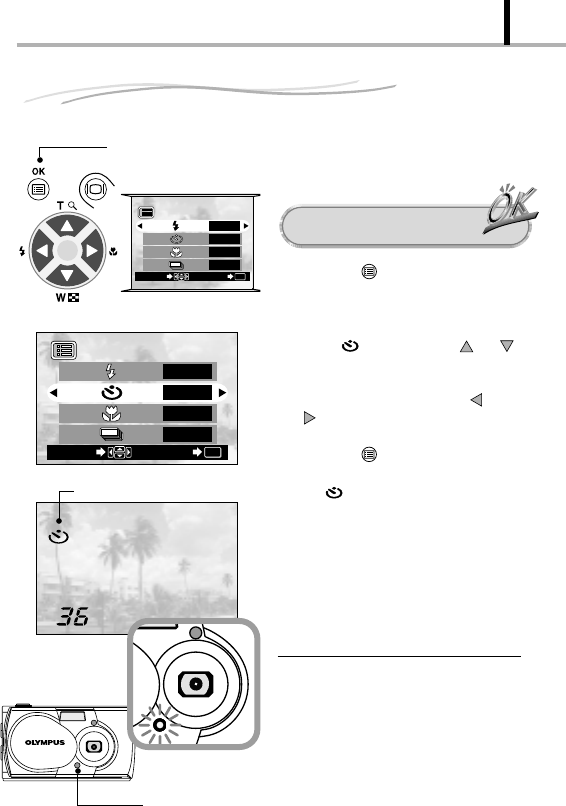
OK/menu button
Arrow pad
1/3
END
OK
SELECT
AUTO
OFF
OFF
OFF
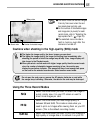
Check that the lens barrier is
open.
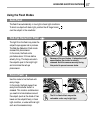
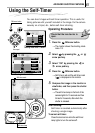
1. Press the OK/menu button.
[The monitor shows the shooting mode
menu 1/3.
2. Select by pressing the or
arrow pad key.
3. Select “ON” by pressing the or
arrow pad key.
4. Press the OK/menu button.
[Self-timer is set and the self-timer mark
( ) is displayed on the monitor.
5. Compose the image in the monitor or
viewfinder, and then press the shutter
button.
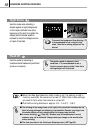
[The self-timer lamp on the front of the
camera lights for 10 seconds and then
blinks for 2 seconds, after which the
shutter is released.
After shooting:
Self-timer is canceled automatically after
shooting a single image.
To cancel self-timer:
Close the lens barrier while the self-timer
lamp lights to turn the camera off.
Operating Procedure
You can shoot images with self-timer operation. This is useful for
taking pictures with yourself included in the image. Fix the camera
securely on a tripod, etc., before self-timer shooting.
Self-timer mark
Self-timer lamp
Shooting mode menu 1/3 screen
Shooting mode menu 1/3 screen