-15-
GEN-LOCKGEN-LOCK
IN
AUXAUX
IN
AUTOAUTO
75
/Hi-Z/Hi-Z
AUTOAUTO
75
/Hi-Z/Hi-Z
R/PR /CR/PR /C
OUTOUT OUTOUT
AUDIOAUDIO
SEE MANUALSEE MANUAL
VIDEO 1VIDEO 1
G/Y/YG/Y/Y VIDEO 2VIDEO 2
B/PB /BB/PB /B SYNCSYNC
S-VIDEOS-VIDEO
1 4
2 3
TALLYTALLY
CAMERA (MULTI)CAMERA (MULTI)
CABLE SELECTCABLE SELECT
FUSEFUSE
250V 1.25A250V 1.25A
TALKTALK
INCOMINCOM
RECEIVERECEIVE
CONTROLCONTROL
TALLY & INCOMTALLY & INCOM
MULTI OVPOVP
MPXMPX
MPXMPX
OUTPUTOUTPUT
VIDEO OUT
G/L IN
I/F REMOTE
OPTION CARD
IRIS
DC12V IN
MENU
ITEM/AWC
YES/ABC
NO/BAR
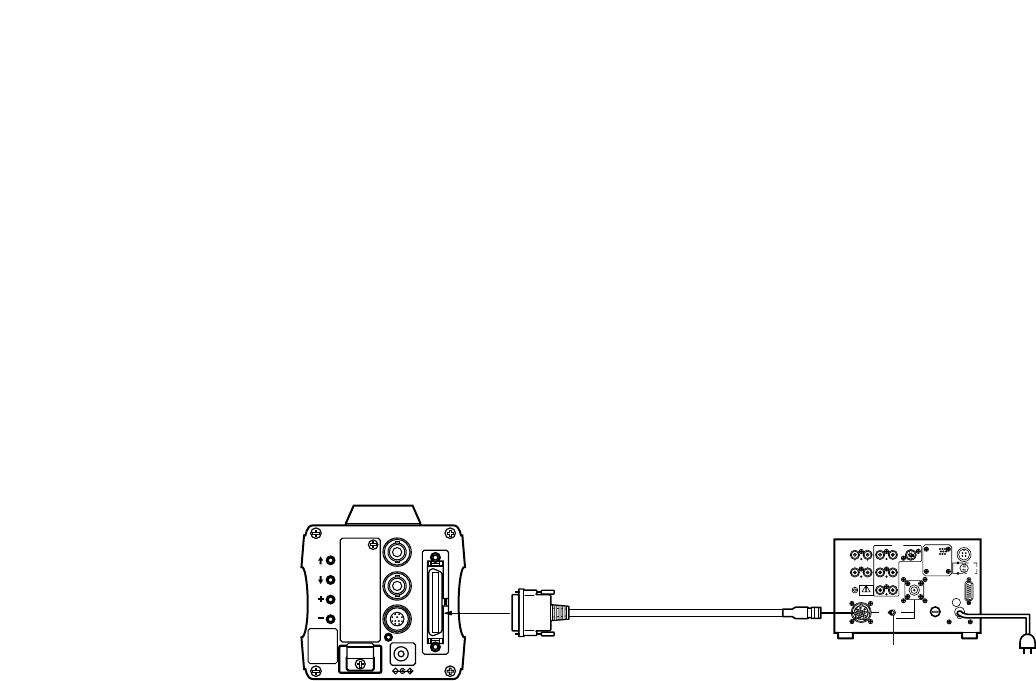
Connection to the RCU (WV-RC700A,WV-RC550) is
made through the optional RCU cable AW-CA50A26.
1. Turn RCU power off before connecting cables.
2. Set the cable selection switch of the RCU to MULTI
(in case of using the WV-RC700A)
3. Connect the 50-pin connector of the RCU cable to
the I/F REMOTE Connector of the camera.
4. Turn RCU power on and the power indicator lamp
will light. The camera can now be remote con-
trolled by the RCU.
Notes:
• The maximum extension distance between the
camera and WV-RC700A is 300 m. The maximum
extension distance between the camera and WV-
RC500 is 100 m.
• Use the following options for cable extension.
Studio Cable WV-CA26U15 (15 m/50 ft)
WV-CA26U30 (30 m/100 ft)
WV-CA26U100 (100 m/330 ft)
Cable Joint Adaptor
WV-CA26T26
■ CONNECTION OF A REMOTE CONTROL UNIT (RCU)
Set to MULTI
WV-RC700A
RCU Cable
AW-CA50A26 (15 m)


