36 VQT1P79 VQT1P79 37
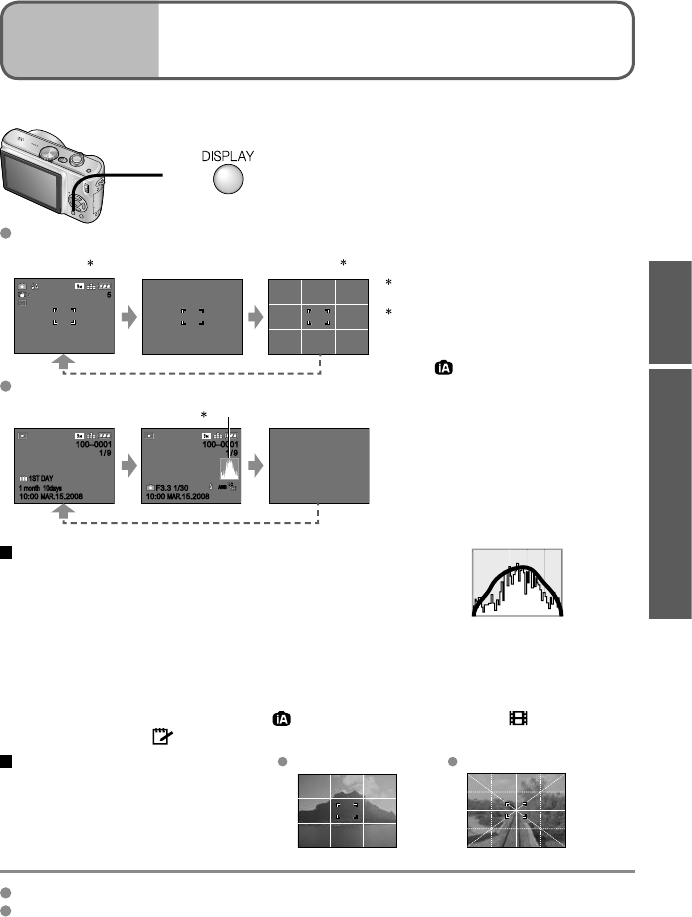
Change between different LCD monitor displays, such as histograms.
Histogram
Displays distribution of brightness in picture
– e.g. if the graph peaks at the right, this means there
are several bright areas in the picture. (Guide) A peak
in the center represents correct brightness (correct
exposure) (P.43).
• Histogram from time of recording is different to histogram in playback and displayed in
orange, when recording with flash or in dark locations. Also, histogram may differ from
histograms made with image editing software.
• Histograms cannot be displayed in (INTELLIGENT AUTO mode), (MOTION
PICTURE mode), (CLIPBOARD mode), or during playback zoom.
Guide lines
Reference for composition
(e.g. balance) when recording.
Judge balance Judge center of subject
During playback zoom, motion picture playback, slideshow : Display on/off
During menu display, multi playback or calendar playback, ‘DUAL PLAY’ (DMC-TZ5 only):
Display cannot be changed.
1
Press to change display
In recording mode
55
No display Guide lines
1,2
Recording
information
1
In playback mode
Recording
information
No display
10:00
MAR.
15.2008
1ST DAY
1 month 10days1 month 10days
10:00
MAR.
15.2008
1ST DAY
1/9
100–0001100–0001
1/9
10:00
MAR.
15.200810:00
MAR.
15.2008
1
/9
100–0001100–0001
1/9
AWBAWB
F3.3 1/30F3.3 1/30
Recording information
or histogram
1
1
Set ‘HISTOGRAM’ to ‘ON’ to display
histogram (P.23).
2
Select guide line pattern and
recording information display on/off
with ‘GUIDE LINE’ setting (P.23).
• When
is in use, recording
information and guide lines cannot be
displayed simultaneously.
(Example)
OKDark← → Bright
Applications
(Record)
1
Changing recording information
display
3
Select type of deletion
SETSET
SELECT
SELECTCANCELCANCEL
DELETE SINGLE
NO
YES
DELETEDELETE
DELETE MULTI
DELETE ALL
• To use
‘DELETE
ALL’ → go to
step 6
4
Select the pictures to delete
(Repeat)
7
11 12
89
OK
DELETE MULTI
CANCEL
SELECT
SET/CANCEL
10
Picture selected
• To release
→ Press
DISPLAY
again
Pictures deleted will be from card if card is inserted, or from built-in memory if the card is
not inserted. Deleted pictures cannot be recovered.
1
Set to
2
Press to delete displayed picture
3
Select ‘YES’
CANCELCANCEL
DELETEDELETE
DELETE MULTI
DELETE ALL
DELETE SINGLE
NO
YES
SETSET
SELECT
SELECT
• Do not turn off
the power during
deletion.
Use a sufficiently charged
battery or an AC adaptor (DMW-
AC5PP, sold separately).
Pictures cannot be deleted in the following cases:
• Protected pictures (P.79)
• Card switch is in ‘LOCK’ position. • Pictures not of DCF standard (P.35)
Motion pictures can also be deleted.
To delete clipboard pictures, set mode dial to .
DISPLAY
Mode dial
5
Delete
6
Select ‘YES’
DELETE MULTI
SET
SELECT
CANCEL
YES
NO
DELETE THE PICTURES
YOU MARKED?
• To cancel → press ‘MENU/SET’.
• May take time depending on
number of pictures deleted.
• ‘ALL DELETE EXCEPT
(FAVORITE)’ may be selected in
‘DELETE ALL’ when 'FAVORITE' is
set to ‘ON’ (P.77) and pictures have
been registered.
To delete multiple (up to 50) or all pictures
(after step 2)
Basics
5
Deleting pictures


