


72 VQT1P79 VQT1P79 73
Applications
(View)
4
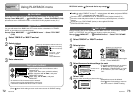
Using PLAYBACK menu
REC/PLAY switch: (Set mode dial to any except )
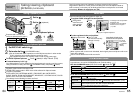
Text input method
CALENDAR
Select date from calendar screen to view only the pictures taken on that day (P.67).
Set-up:
Press ‘MENU/SET’ → ‘ PLAYBACK menu’ → Select ‘CALENDAR’ (P.20)
Cannot be set in ‘CATEGORY PLAY’ or ‘FAVORITE PLAY’ playback modes (P.71).
TITLE EDIT
You can edit names from ‘BABY’ and ‘PET’ scene modes or destination in ‘TRAVEL
DATE’, or give titles to your favorite pictures.
Set-up: Press ‘MENU/SET’
→
‘ PLAYBACK menu’ → Select ‘TITLE EDIT’
(P.20)
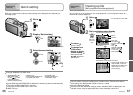
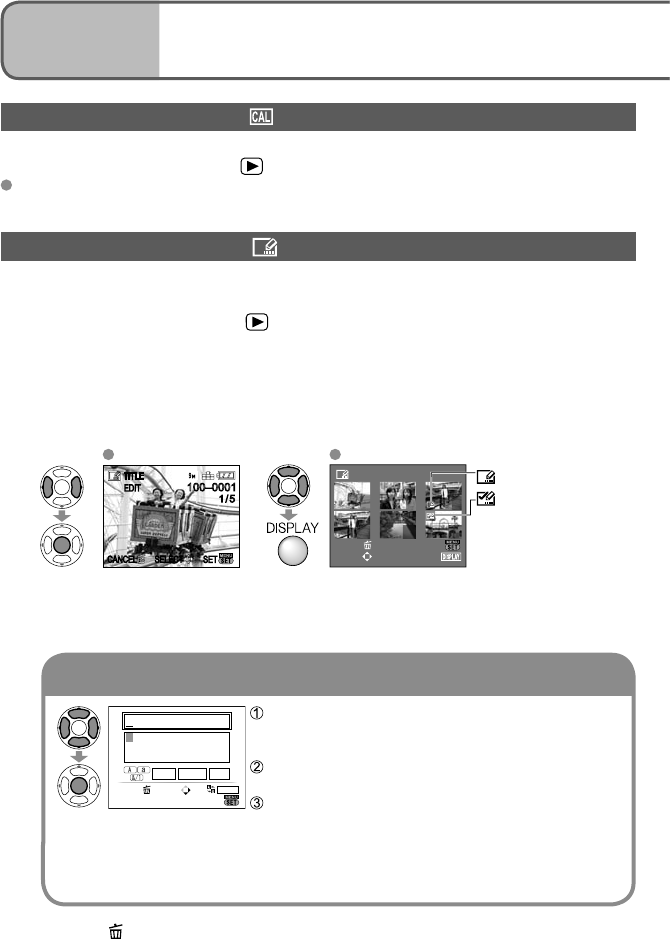
1
Select ‘SINGLE’ or ‘MULTI’ and set
2
Select picture
SINGLE MULTI (up to 50 pictures with the same text)
TITLE
EDIT
TITLE
EDIT
SETSET
SELECT
SELECTCANCELCANCEL
1/5
100–0001100–0001
1/5
7
10 11 12
89
OK
CANCEL
SELECT
SET/CANCEL
TITLE EDIT
TITLE EDIT setting
TITLE EDIT already
set
• To cancel → Press
[DISPLAY] again
• To set →
Press ‘MENU/SET’.
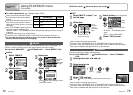
3
Enter characters
CURSOR
W– T
SPACE
DELETE
DISPLAY
EXIT
ABCDEFGHIJKLMNOP
QRSTUVWXYÀÂÄÇÈÉ
ÊË Î Ï ÑÔÖ ÙÛÜŒ
CANCEL
SELECT
INPUT
Press display button several times to select
character type
(Upper case, lower case, symbols/numbers)
Select characters with ▲▼◄►, and press
‘MENU/SET’ (repeat)
Select ‘EXIT’ with ▲▼◄►, and press
‘MENU/SET’
• A maximum of 30 characters can be entered.
• Input cursor may be moved with the zoom lever.
• Text will be scrolled if title does not fit on screen.
To edit select ‘SINGLE’ in step 1→ select picture with ◄►, and press ‘MENU/
SET’ → correct text and press ‘EXIT’
Cannot be set in ‘CATEGORY PLAY’ or ‘FAVORITE PLAY’ playback mode (P.71).
Cannot be used with pictures taken on other devices, protected pictures, or motion
pictures.
To print text, use ‘TEXT STAMP’ (below) or the supplied CD-ROM
(PHOTOfunSTUDIO-viewer-).
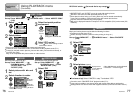
TEXT STAMP
Stamp recording date or text registered in the ‘BABY’ and ‘PET’ scene modes, ‘TRAVEL
DATE’, or ‘TITLE EDIT’ into your pictures. Ideal for regular size printing.
Set-up: Press ‘MENU/SET’
→
‘ PLAYBACK menu’ → Select ‘TEXT STAMP’
(P.20)
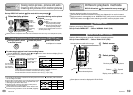
1
Select ‘SINGLE’ or ‘MULTI’ and set
2
Select picture
SINGLE MULTI (up to 50 pictures)
TEXT
STAMP
TEXT
STAMP
SETSET
SELECT
SELECTCANCELCANCEL
1/5
100–0001100–0001
1/5
OK
CANCEL
SELECT
SET/CANCEL
7
10 11 12
89
TEXT
STAMP
setting
• To cancel → Press display button again.
• To set → Press ‘MENU/SET’.
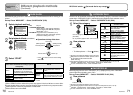
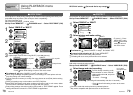
3
Select items and make settings for each
TITLE
OFF
SHOOTING DATE
AGE
OFF
OFF
TRAVEL DATE
TEXT STAMP
W/O TIME
SET
SELECT
CANCEL
Select ‘ON’ to
stamp
• To stamp inputted texts such as names
in ‘BABY’ and ‘PET’ scene modes,
destination in ‘TRAVEL DATE’, or a title
in ‘TITLE EDIT’, set ‘TITLE’ setting to
‘ON’.
4
Select ‘YES’
(Screen varies according to picture size, etc.)
SETSET
SELECT
SELECTCANCELCANCEL
TEXT STAMP TEXT STAMP
SAVE NEW PICTURES?
NO
YES
• Stamped text cannot be deleted.
• Press when finish setting to return to
the menu screen in ‘SINGLE’ setting.
(Press when finish setting to return to the menu screen in ‘SINGLE’ setting.)