


- 79 -
You can set the built-in microphone's sound quality as appropriate for the scene you want to record.
≥ Set [MIC SETUP] to [SURROUND] or [STEREO MIC]. (l 80)
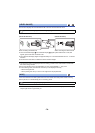
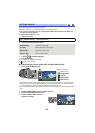
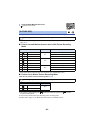
1 Select the menu.
2
(When [Customize] is selected)
Select the desired item.
3
(When [Microphone Gain] is selected in Step 2)
Select an item.
(When [Frequency Response] is selected in Step 2)
Touch / to adjust.
≥ Before recording, check the effect you have selected with a headphone set, etc.
≥ The high frequency range (dB) and low frequency range (dB) can be adjusted.
≥ If noises such as the sound caused by the wind bother you, set the low frequency range to
[LowCut].
≥ To end the adjustment, touch [EXIT].
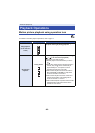
[Sound Scene Select]
: [RECORD SETUP] # [Sound Scene Select] # desired setting
[Auto]: Records sounds with standard settings.
[Music]: For recording scenes in which you need to cover a wide sound range
and a wide volume range, such as music concerts.
[Speech]: For recording speeches, talk sessions, and other events in which
sounds will be coming mostly from the front of this unit.
[Nature]: For recording in serene environments, such as forests and rivers.
[Festival]: For recording festivals, fireworks displays, and other very loud
scenes.
[Customize]: Allows you to adjust [Microphone Gain], [Frequency Response] and
[Directional].
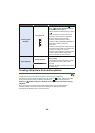
[Microphone Gain]: Select this item when the sound recorded in a loud scene is
distorted.
[Frequency Response]: Adjusts the high frequency range and low frequency range
levels.
[Directional]: Select [SURROUND]/[STEREO] or [MONO].
[Normal]:
Adjusts the sound quality automatically.
[Attenuate]: Records sounds of very loud scenes at appropriate volume.
MENU