


152
5
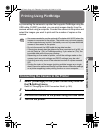
Editing and Printing Images
12
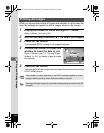
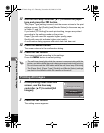
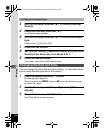
Use the four-way controller (23) to select the paper
type and press the 4 button.
The [Paper Type] setting is saved, and the screen returns to the print
settings screen. Set [Quality] and [Border Status] in the same way as
in Steps 11 and 12.
If you select [_ Setting] for each print setting, images are printed
according to the settings made on the printer.
Paper Type with more E supports higher quality paper.
Quality with more E indicates higher print quality.
A confirmation dialog appears after each item has been set.
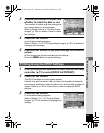
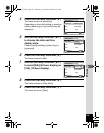
13
Press the 3 button.
The screen returns to the confirmation dialog.
14
Press the 4 button.
The image is printed according to the settings.
Press the 3 button to cancel printing.
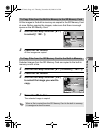
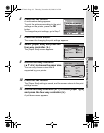
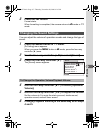
1
In the printing mode selection
screen, use the four-way
controller (23) to select [All
Images].
2
Press the 4 button.
The setting screen appears.
• The self-timer lamp lights while the camera is communicating with the
printer, and blinks while the card is being accessed and during printing.
Do not disconnect the USB cable while the self-timer lamp is blinking.
• The [Paper Size], [Paper Type], [Quality] and [Border Status] settings
are reset to the defaults when the camera is turned off.
Printing All Images
Single Image
Select printing mode
Select printing mode
OK
OK
OK
OK
All Images
DPOF AUTOPRINT
e_kb477.book Page 152 Thursday, November 20, 2008 4:21 PM