


3
Hardware Installation
The PTZ Robotic Camera System requires some assembly, even if you had ordered it with a new
Pioneer 2 Mobile Robot.
Mounting the Camera
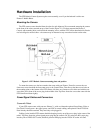
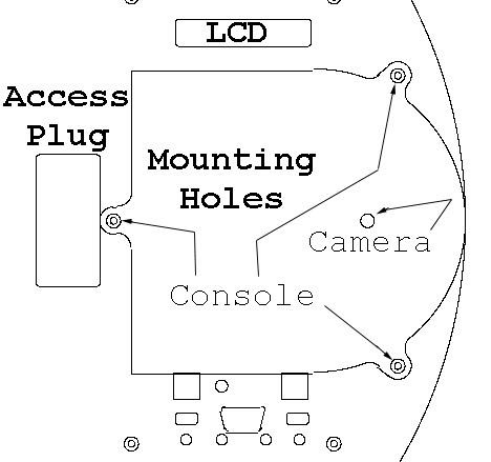
The PTZ camera comes detached from the robot for safe shipment. We recommend mounting the camera
to the front of the robot, centered on top of the Console (Figure 2-1). We have prepared the Pioneer 2
Console with mounting holes, and include the mounting screws with the PTZ camera installation kit. But do
not feel obliged to mount it there—the camera may be mounted to any convenient location on the robot.
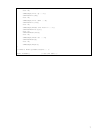
Figure 2-1. PTZ Robotic Camera mounting plate and position
To mount the camera, use the hex wrenches that came with your Pioneer. If need be, remove the two
front-most screws that hold the front sonar array to the Console Plate. Then line up the three screw holes on
the mounting plate on the bottom of the PTZ camera with those two frontmost screw holes and with the one
screw hole just in front of the access plug in the middle of the Top Plate. Insert the screws that came with the
PTZ Camera and fasten tightly.
Power/Signal Cables and Connectors
Came with Robot
If your PTZ camera came with your new Pioneer 2—with or without the optional Surveillance Video or
Fast Track Vision System—the signal, power, and VISCA control cabling, and optional Video/FTVS Side
Panel already should be attached. They need only to be plugged in.
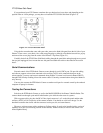
Cabling for the installed PTZ camera should be hanging loosely out of the access plug in the center of the
robot's Top Plate. Insert the yellow-tipped power plug into the camera's DC IN socket; the RCA-style plug
into the yellow VIDEO OUT socket; and the 8-pin mini-DIN plug into the VISCA IN socket. All done.