20
DIAGNOSTIC PROCEDURES
USB Video Diagnostic - If live video is not displayed on the PC monitor
of the Polaris System when the imaging software application is running, there
could be a problem with the settings in the software application or with the
handpiece. Perform the following USB Video Diagnostic procedure to check
that the Polaris handpiece is working correctly, the Polaris Handpiece Cable
is correctly connected between the Polaris System and the computer and the
Polaris System USB driver files are installed correctly on the PC.
1. Go to the Start button and select Programs.
2. Select the Polaris program option and click on Camera Demostration
Program and observe that the Camera Demonstration Program screen opens.
3. Depending on the outcome of the diagnostic, perform one of the following:
a. If a live image is correctly displayed, exit from the application and make
sure that the imaging software application is configured correctly.
b. If a live image is not displayed, exit from the application and check the
handpiece, Polaris Handpiece Cable and USB driver file installation.
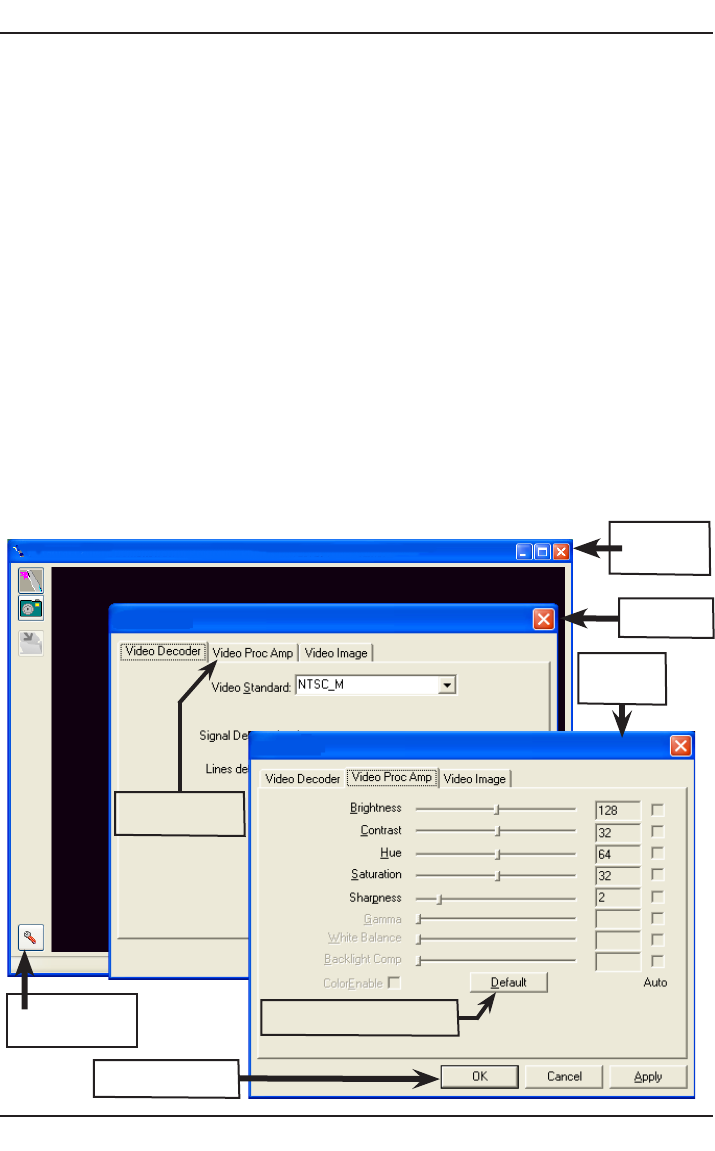
4. Reset the driver's video settings by performing the following:
a. On the Polaris Demostration Program screen, click the Properties
button located on the lower left of the live image screen.
b. On the Properties screen select the VIDEO PROC AMP tab and then
click the DEFAULT button. The image colors should now be correct.
Click OK to close the Properties screen and exit from application.
Intraoral Camera Demonstration Program - Polaris Intraoral Video Camera
Properties
Live
Image
Screen
Properties
Screen
Tab Opens Video
Proc Amp Screen
Default Button: Selects
Default Settings as Shown
Properties
Button:Opens
Properties Screen
Video
Proc Amp
Screen
OK Button: Closes
Properties Screen
