Advanced Features
60 Chapter 5
CHARGE
STOP R RETAKE F
LIGHT
OFF AUTO ON
COUNTER R/M
FADE/WIPE
P. AE
DIGIFECT
POWER
REFRESH
EJECT
POWER
indicator
Power switch
M
E
N
U
/
B
R
I
G
H
T
/
T
R
A
C
K
I
N
G
5
S
E
C
.
R
E
C
V
O
L
S
T
E
A
D
Y
P
I
X
/
T
B
C
+
+
P
L
A
Y
O
F
F
A
M
S
T
O
P
R
R
E
T
A
K
E
F
L
I
G
H
T
O
F
F
A
U
T
O
O
N
C
O
U
N
T
E
R
R
/
M
F
A
D
E
/
W
I
P
E
P
.
A
E
D
I
G
I
F
E
C
T
A
M
P
L
A
Y
O
F
F
MENU
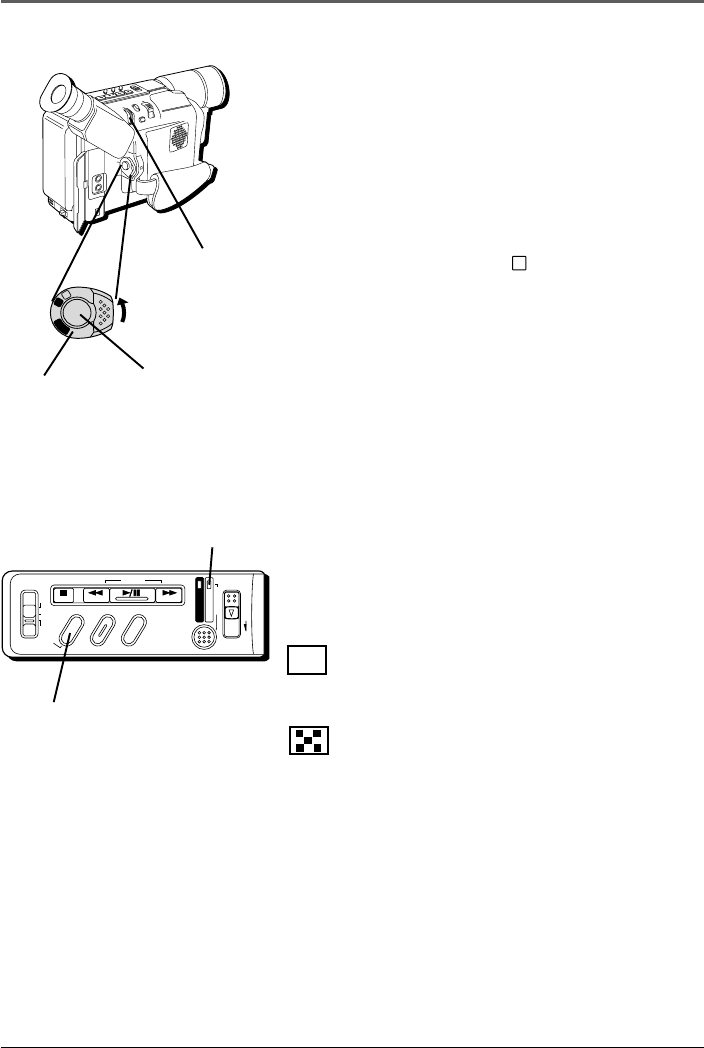
dial
FADE/WIPE
button
Recording
Start/Stop
button
Using the Advanced Features
Fade/Wipe Effects
These effects let you make professional-looking
scene transitions. Fade-ins or wipe-ins work at
recording start, and fade-outs or wipe-outs work at
recording end.
1. Set the Power switch to
M
(manual record).
(The POWER indicator comes on.)
2. Press FADE/WIPE repeatedly until the desired
mode’s name and icon appear.
(They are
displayed for approximately 2 seconds, then the
name disappears so that only the icon remains.)
3. Press the Recording Start/Stop button to activate
fade-in/out or wipe-in/out.
4. To cancel a fade or wipe, press FADE/WIPE
repeatedly until OFF appears. (OFF is displayed
for approximately 2 seconds and the fade/wipe
standby mode is cancelled.)
Fades
B
K
FADER
Fades in/out to a black screen.
MOSAIC
Gradually turns/returns the picture into/from a
mosaic pattern.
