88
6
Playback Menu
Note -------------------------------------------------------------------------------------
• To cancel, press the DISP. button.
• Press the D button to reset white balance.
• For help, press the Fn button; press the button again to return to the preview
display.
Skew Correction
Create copies that have been processed to reduce the effects of
perspective on rectangular objects, such as message boards or
business cards.
Caution ---------------------------------------------------------------------------------
• You can only use skew correction for still images shot with this camera.
• You cannot use skew correction for movies or MP files.
Note -------------------------------------------------------------------------------------
• If the camera is able to detect an object that can be used to correct perspective,
a message will be displayed with the object shown by an orange frame. The
camera can detect up to five objects.
• If the target area cannot be detected, an error message appears. The original
image remains unchanged.
• To select another correction area, move the orange frame to the target area by
pressing the ADJ./OK button F.
• To cancel skew correction, press the ADJ./OK button !. Even if you cancel skew
correction, the original image remains unchanged.
• The image size does not change for skew corrected images.
• If the image size is large, skew correction will take time. Resize the image
(GP.80) before performing skew correction to speed up the process.
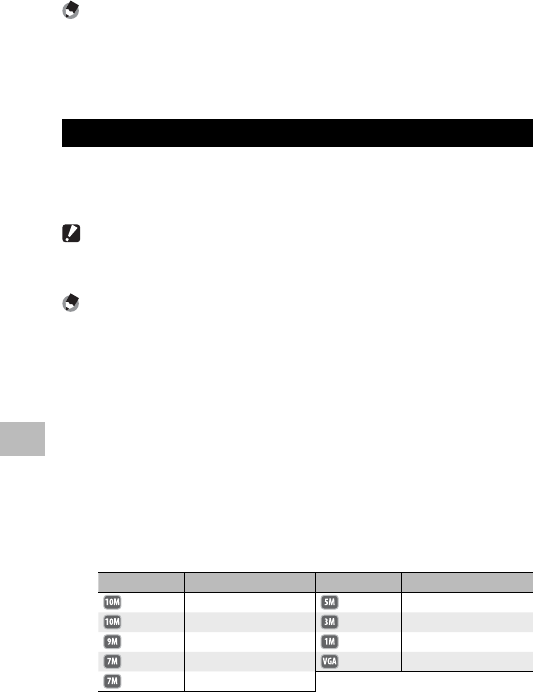
• The following table shows the approximate time required for skew correction.
Image Size Correction time Image Size Correction time
4 : 3 F Approx. 23 seconds 4 : 3 F Approx. 12 seconds
4 : 3 N Approx. 22 seconds 4 : 3 F Approx. 8 seconds
3 : 2 F Approx. 17 seconds 4 : 3 F Approx. 3 seconds
1 : 1 F Approx. 13 seconds 4 : 3 F Approx. 1 seconds
16 : 9 F Approx. 13 seconds
• When scene mode is set to [Skew Correct Mode], you can shoot an image and
then immediately correct any skew in the image. (GP.55)


