


41
S button
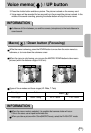
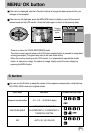
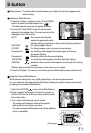
Selecting a White Balance
1. Press the S button, and then use the UP and DOWN
buttons to select the white balance icon ( ).
The white balance menu bar will appear as shown.
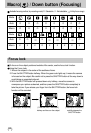
2. Use the LEFT and RIGHT buttons to set the white
balance to the desired value. The value you set will be
displayed on the LCD monitor.
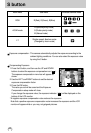
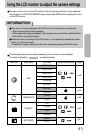
AUTO : The camera automatically
selects the appropriate white
balance settings, depending on the prevailing lighting conditions.
DAYLIGHT : For taking images outside.
CLOUDY : For taking images under a cloudy and overcast sky.
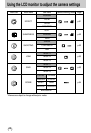
Fluorescent H : For shooting under daylight fluorescent types of three-way
fluorescent lighting.
Fluorescent L : Shooting under white fluorescent lighting.
TUNGSTEN : For shooting under tungsten (standard light bulb) lighting.
CUSTOM : Allows the user to set the white balance according to the shooting
condition.
Different lighting conditions may cause a colour cast on your images.
3.
Press the OK button. The value you set will be saved and White Balance setup mode will end.
White balance : The white balance control allows you to adjust the colours to appear more
natural looking.
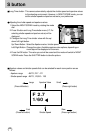
Using the Custom White Balance
White balance settings may vary slightly depending on the shooting environment.
You can select the most appropriate white balance setting for a given shooting environment
by setting up the custom white balance.
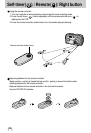
1. Select the CUSTOM( ) menu of the White Balance.
2. Place a sheet of white paper in front of the camera so
that the LCD monitor shows only white, and then press
the shutter button.
3. Your custom white balance value is stored.
- The custom white balance value will be applied,
starting with the next picture you take.
- The user configured white balance will remain effective
until it is overwritten.
[ White paper ]