


English _31
● INSTALLATION & CONNECTION
3.
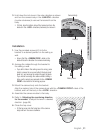
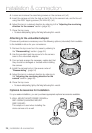
Hold down the lock lever in the outer direction as shown
and turn the camera body in the <UNLOCK> direction
(counter clockwise) to remove the bracket from the
body.
If it fails, take the bottom hole of the bracket and turn the
bracket in the <LOCK> direction (clockwise) to remove it.
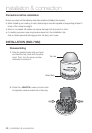
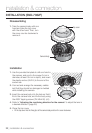
Installation
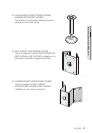
1. Use the provided screws (x3) to fix the
bracket to a desired position on the ceiling or
wall.
Ensure that the <CAMERA FRONT> label on the
bracket faces the direction for camera monitoring.
2. Arrange the cables thr
ough the bracket to
the ceiling or wall.
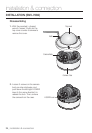
If you drill a hole in the ceiling cover for wiring, press
hard to remove the cover and attach the dust-proof
plate to it, and arrange the cables through the plate.
If you intend to arrange the cables without drilling a
hole, use the empty area opposite to the <CAMERA
FRONT> label side for the wiring purpose.
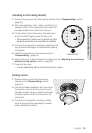
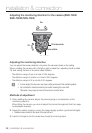
3.
Mount the camera body onto the bracket.
Align the marking hole of the camera body with the <CAMERA FRONT> label of the
bracket, and turn the body in the <LOCK> direction.
4.
Assemble the camera module to the body.
5.
Refer to “Adjusting the monitoring direction
for the camera” to adjust the lens in a desired
direction. (page 38)
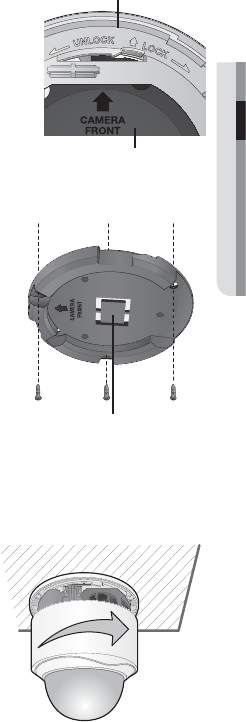
6. Close the top cover.
Fit the top cover into the fixing tips of the camera
body and turn the cover clockwise.
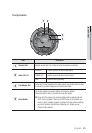
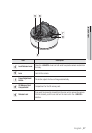
Bracket
Camera Body
Wiring Cover
UNLOCK