


installation & connection
36_ installation & connection
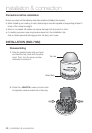
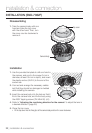
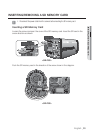
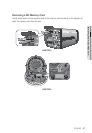
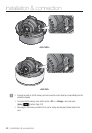
4. Loosen and remove the case-fixing screws on the camera unit. (x3)
5. Insert the camera unit into the hole so that it fits to the camera hole, and fix the unit
using the ASSY tapping screws (TH M4×L30). (x3)
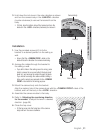
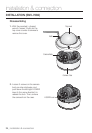
6. Adjust the lens in a desired direction by referring to the “Adjusting the monitoring
direction for the camera” section. (page 38)
7. Close the top cover
.
To ensure waterproofing, tight up the fixing bolts using the L-wrench.
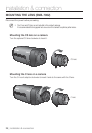
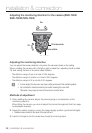
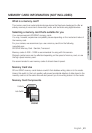
Attaching to the unbundled adapter
Choose and purchase a necessary one of the following options (unbundled) that is suitable
to the installation site or for your convenience.
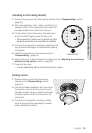
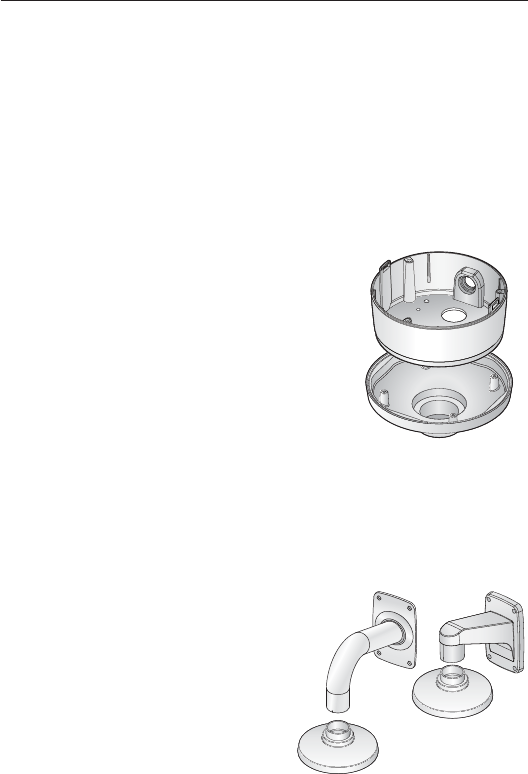
1. Remove the top cover from the case by referring to
the “Disassembling” section. (page 34)
2. Use the pr
ovided machine screw to fix the camera
case to the unbundled adapter.
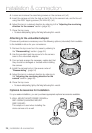
3. Connect and arrange the necessary cables lest that
they should be damaged or twisted while installing
the camera.
4. Install the camera body in the reverse order of
“Disassembling”. (page 34)
5. Adjust the lens in a desir
ed direction by referring to
the “Adjusting the monitoring direction for the
camera” section. (page 38)
6. Close the top cover
.
To ensure waterproofing, tight up the fixing bolts using the L-wrench.
Optional Accessories for Installation
For your easier installation, you can purchase appropriate optional accessories available.
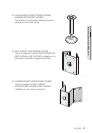
1. WALL MOUNT ADAPTOR(SBP-300WM or
SBP-300WM1)/HANGING MOUNT
(SBP-300HM3)
This adaptor is used when installing the
dome camera onto a wall.