INDEX
CONTENTS
15
3
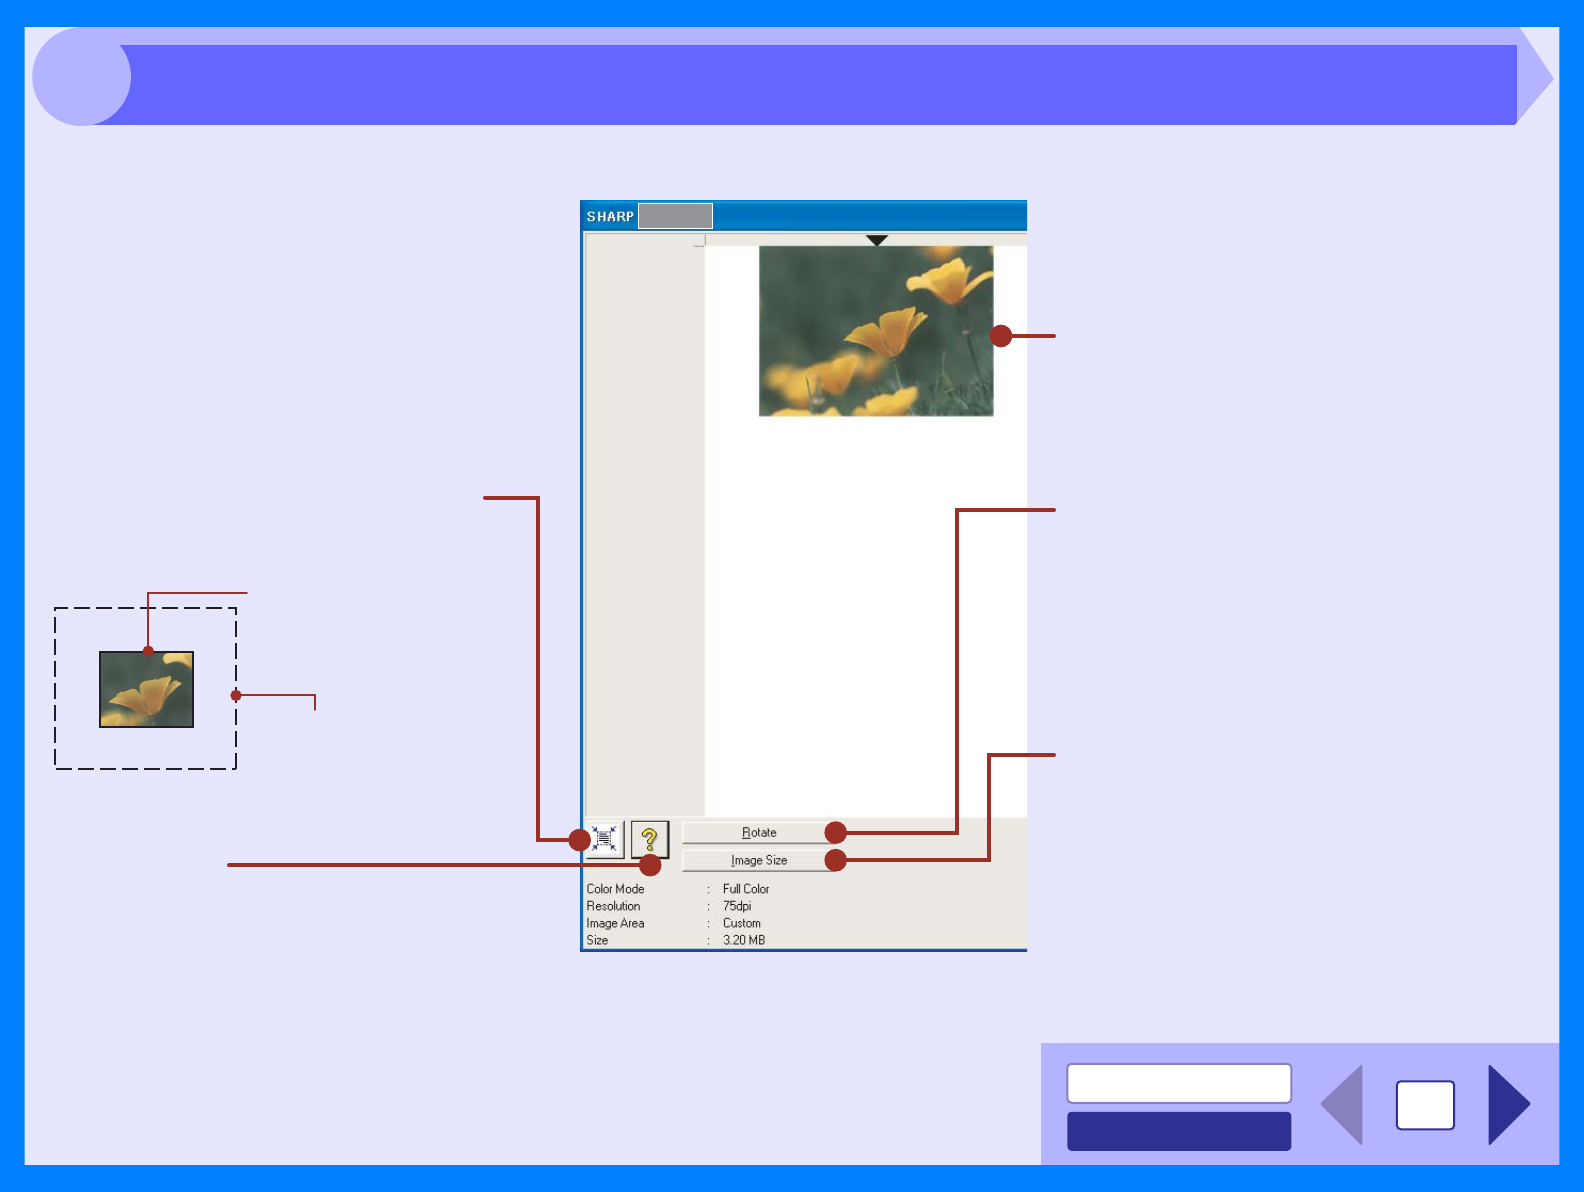
Preview screen
Preview window
Click the "Preview" button in the Set-up
screen to display the scanned image. You
can specify the scanning area by dragging
the mouse inside the window.
"Auto Scan Area Adjustment" button
Click when the preview screen is displayed to
automatically set the scanning area.
"Help" button
Click to display the help file for the scanner
driver.
Click the "Auto Scan Area
Adjustment" button to adjust
the scanning area
automatically.
Entire preview screen
"Rotate" button
Each time this button is clicked, the preview
image rotates 90 degrees. This lets you
change the orientation of the image without
picking up and placing the original again. The
image file will be created using the
orientation that appears in the preview
window.
"Image Size" button
Click to open a dialog box that allows you to
specify the scanning area by entering
numbers. Pixels, mm, or inches can be
selected for the units of the numbers. By
initially specifying a scanning area, numbers
can be entered to change that area relative
to the top left corner as a fixed origin.
Scanning an Image from a TWAIN-Compliant Application (part 4)


