


(smallest number) and the camera will automatically select the fastest shutter speed
setting that will still provide the correct exposure. While in Av mode, you can also
use the QCD to change/bias the exposure up or down (AEC). This is only the ambient
exposure bias and it does not effect the flash exposure.
In P, Av or Tv modes, a blinking aperture or shutter indicator may mean that it is
out of its available range. So if your aperture is blinking f/5.6 and that is the lens’s
largest aperture, you will have to select a slower shutter speed to bring the required
aperture in line with your lens’s available aperture. Also if 4000 is blinking, then use a
smaller aperture to bring the required shutter speed down to what the camera is capable
of doing.
The shutter speed also blinks as a shake warning if the shutter speed falls more than
1/2 stop below the reciprocal of the lens length.
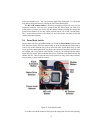
M is for manual exposure mode. You select the aperture with the Main Dial and
shutter speed with the QCD. The camera’s built-in light meter will still function in
manual mode and you can follow its lead or ignore it completely. The meter’s display
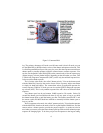
can be seen both in the viewfinder as well as on the top mounted Liquid Crystal Dis-
play (LCD) on the top right side of the camera. A proper exposure, according to the
camera’s meter, is when the meter indicator is centered on the scale. The meter scale
covers a four stop range. Each hash mark represents 1/2 stop of exposure deviation.
A negative indication shows with underexposure and a positive indication shows with
overexposure.
DEP is for depth of field auto exposure mode. It allows the camera to decide the
appropriate aperture and focus position to provide enough depth of field to keep two
selected distances sharply in focus. The easiest way to use it is to turn the Command
Dial to DEP, and use the center auto focus sensor, point the camera at the first subject
and press the shutter button half way to autofocus. Let the button up and then point the
same AF sensor on the top of the second subject and press the shutter half way again
to allow the lens to autofocus on the second subject. Then reframe your camera and
take the picture. The camera will select a focus distance between the subject distances,
then select an aperture small enough to keep both subjects in focus and then select a
shutter speed that will provide proper exposure. If you select the same subject distance
twice, the camera will select the widest aperture available to keep depth of field very
shallow. The lens must be set to AF for DEP mode to work and if you are using a zoom
lens, you must not change its zoom setting during the entire procedure. You can also
manually or eye control select the side AF sensors, but I think it just adds confusion.
A blinking aperture indicated that sufficient depth of field (DOF) can not be achieved.
You must focus on subjects that are closer to the same distance apart or use a wider an-
gle lens. Flash can not be used with DEP mode
CF (Custom Function) is discussed below
CAL (Elan IIe only) is used for calibrating the Eye Control Focus (ECF) of the
Elan IIe to the shape and size of your eye. Turn the Command Dial to CAL, look
directly at the blinking AF point, press and hold the shutter button until the camera
beeps. Then look directly at the next blinking AF point and hold the shutter button
until the camera beeps. Turn the camera to the vertical position and press and release
the shutter briefly. Then look directly at the blinking AF point, press and hold the
shutter button until the camera beeps. Then look directly at the next blinking AF point
7