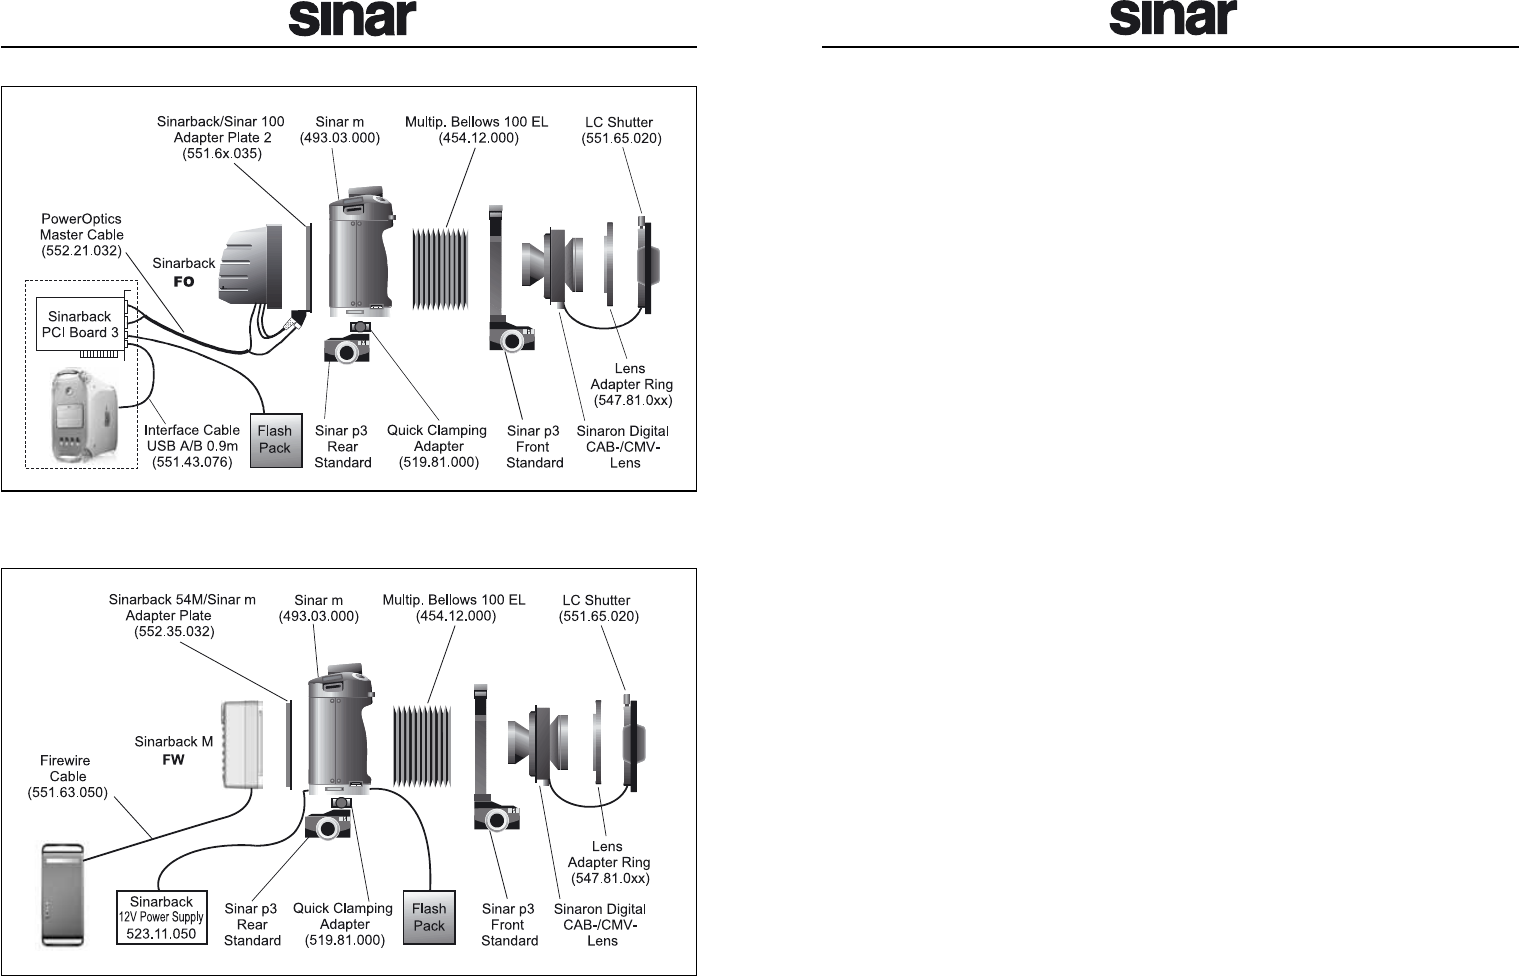
Set-Up
1. Mount the Sinarp3 on a sturdy tripod or stand.
2. Remove the carrier frame of the rear standard of the Sinarp3.
3. Mount the Quick Clamping Adapter m 519.81.000 in place of the car-
rier frame.
4. Screw both tripod screws that are included with the Quick Clamping
Adapter in the bottom and on the left side of the Sinar m and tighten
them with a small coin.
5. Place the Sinar m on the Quick Clamping Adapter and pull its clamp-
ing lever backwards.
6. Remove both protecting covers of the Sinarm: The rear one by slid-
ing the snap lock slider to the left, the front one by pulling the left lock-
ing slider upwards to the left and the right looking slider upwards to
the right.
7. Mount the Sinarback on the corresponding adapter plate
(551.63.235/551.64.235 / 551.65.235 or 552.35.232), insert the
adapter plate in the bottom groove on the backside of the Sinarm,
and push the Sinarback towards the Sinar m until the snap lock slid-
er snaps in automatically.
Notice:
Check if the adapter plate is locked in place correctly.
8. Mount the bellows on the front of the Sinarm and lock it by pushing
both locking sliders inwards. When using lenses with focal lengths
shorter than 90mm we recommend the use of a wide angle bellows.
9. Attach the bellows to the carrier frame of the front standard of the
Sinarp3.
10. Place the Sinaron Digital CAB or CMV lens in the carrier frame of the
front standard.
11. Screw the matching lens adapter ring on to the lens.
12. Plug the cable of the LC Shutter in the corresponding socket on the
lens.
13. Put the LC Shutter on the lens adapter ring and lock it in place with
the clamping screw.
4 5
Diagram 6: Sinar m on a Sinar p3 with Sinarback (fiber optics), Sinaron
Digital CAB Lens and LC Shutter, power supplied by PCI Board 3
Diagram 7: Sinar m on a Sinar p3 with Sinarback (M-series, firewire),
Sinaron Digital CAB Lens and LC Shutter, power supplied by a 12 Volt
Power Supply


