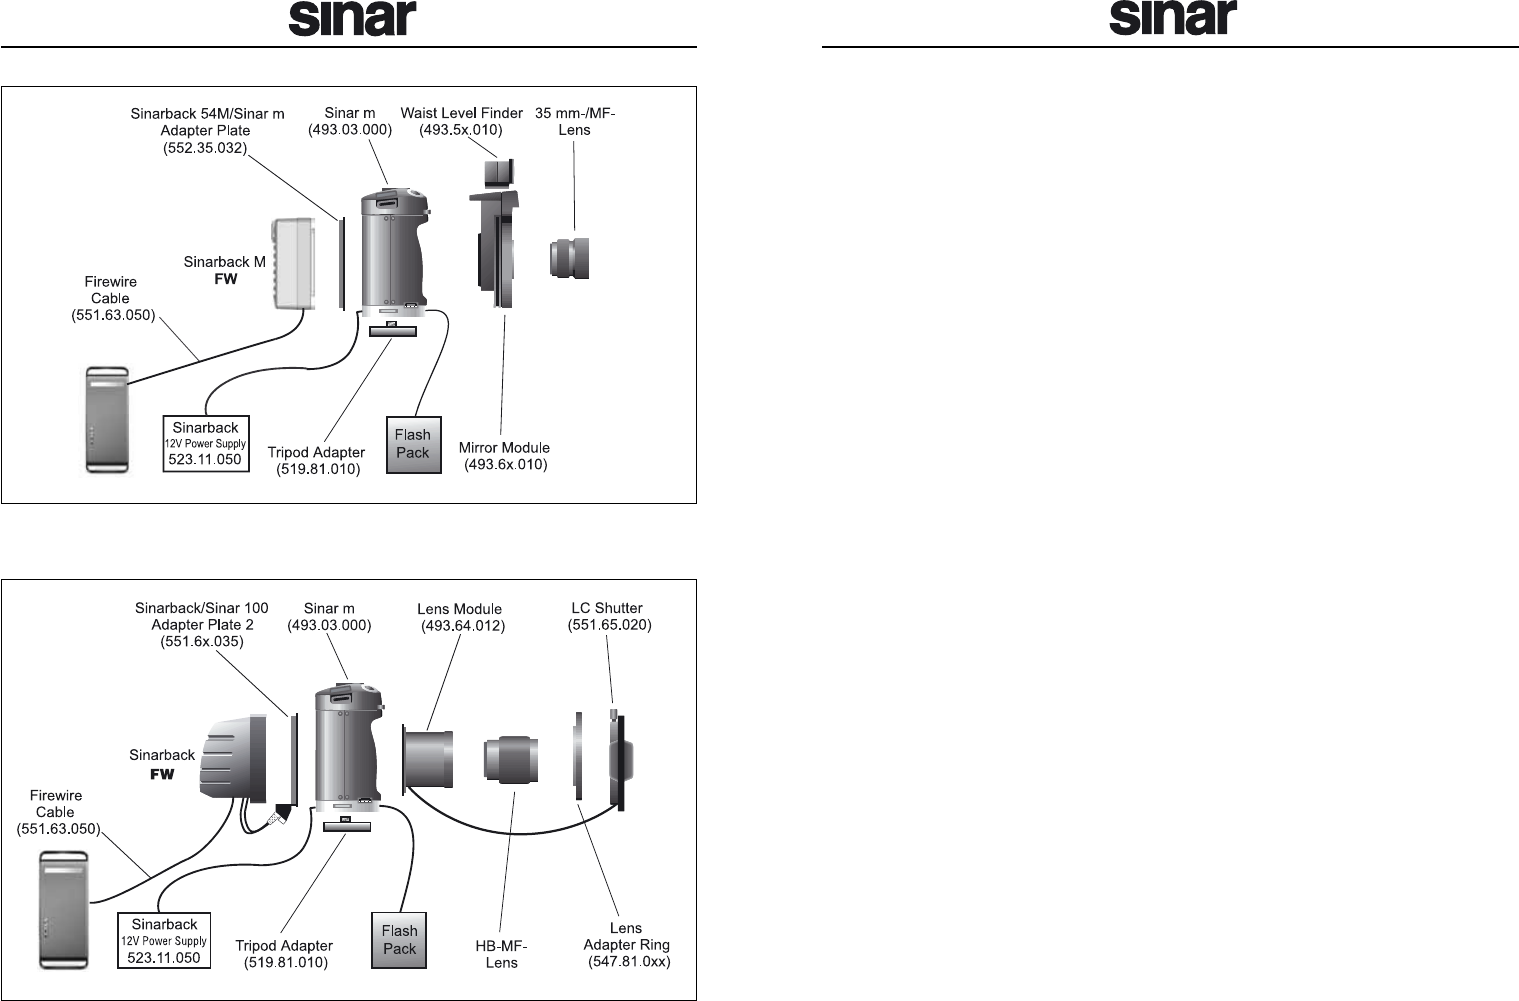
Set-Up
1. Screw the Tripod Adapter 519.81.010 on to the Sinarm and tighten
the screw with a coin.
2. Mount the Sinarm on a sturdy tripod or stand.
3. Remove both protecting covers of the Sinarm: The rear one by slid-
ing the snap lock slider to the left, the front one by pulling the left lock-
ing slider upwards to the left and the right looking slider upwards to
the right.
4. Mount the Sinarback on the corresponding adapter plate
(551.63.235/551.64.235 / 551.65.235 or 552.35.232), insert the
adapter plate in the bottom groove on the backside of the Sinarm,
and push the Sinarback towards the Sinarm until the snap lock slid-
er snaps in automatically.
Notice:
Check if the adapter plate is locked in position correctly.
5. Remove the Light Gate of the Sinarm (except when a Hasselblad
Lens Module 493.64.012 is used).
6. Mount the mirror module or the lens module on the front of the Sinar m
and lock it by pushing both locking sliders inwards. Check if the mir-
ror module or the lens module is locked in position correctly.
7. Mount the view finder and the desired lens in the mirror module re-
spectively the lens in the lens module.
8a. When using a Hasselblad Lens Module, screw the matching lens
adapter ring on the lens bayonet.
8b. Plug the cable of the LC Shutter in the corresponding socket on the
lens module.
8c. Put the LC Shutter on the lens adapter ring and lock it in place with
the clamping screw.
9. Connect the Sinarback with the Macintosh computer either via the
firewire or fiber optics cable depending on the type of the Sinarback.
10. Plug the 12Volt power supply in the corresponding socket on the rear
side of the Sinarm and on the mains supply.
98
Diagram 11: Sinar m with Hasselblad lens module, Sinarback (firewire)
and LC Shutter
Diagram 10: Sinar m with mirror module and Sinarback (M-series,
firewire)


