


111
Printing still images
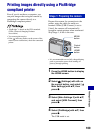
Printing images directly using a PictBridge compliant printer
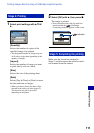
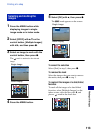
1 Select print settings with v/V/b/
B.
[Quantity]
Selects the number of copies of the
specified image to be printed.
• The designated number of images may not
all fit onto a single sheet depending on the
quantity of images.
[Layout]
Selects the number of image you want
to print side by side on a sheet.
[Size]
Selects the size of the printing sheet.
[Date]
Selects [Day & Time] or [Date] to insert
the date and time on images.
• When you choose [Date], the date will be
inserted in the order you select (page 87).
This function may not be provided
depending on the printer.
2 Select [OK] with v, then press z.
The image is printed.
• Do not disconnect the cable for multi-use
terminal while the (PictBridge
Connecting) indicator appears on the screen.
Make sure the screen has returned to
Stage 2, and disconnect the cable for multi-
use terminal from the camera.
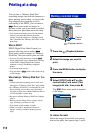
Stage 4: Printing
Stage 5: Completing the printing
indicator