


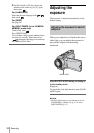

Recording
32
(No flash): Always records without
using the flash.
When the red eye reduction feature
is turned on
(Auto red-eye reduction): Pre-flashes to
reduce red-eye before the flash
automatically flashes when there is not
enough surrounding light.
m
(Forced red-eye reduction): Always
uses the flash and the red-eye reducing pre-
flash regardless of the surrounding
brightness.
m
(No flash): Always records without
using the flash.
b Note
• Remove the dust from the surface of the flash lamp
before using it. You may not get a sufficient amount
of flash if the dust discolors or sticks to the lamp due
to the heat from flashing.
• The red-eye reduction may not produce the desired
effect due to individual differences and other
conditions.
• The flash charge indicator flickers while charging,
and remains lit when the battery charge is complete.
(In the CAMERA-TAPE mode, it takes a while to
fully charge the flash lamp since it charges its battery
with the flash lamp open.)
• The flash will not work during the following
operations:
– Super NightShot plus function
– Color Slow Shutter function
– Digital effect
– Progressive recording mode
–Burst
– During tape recording
– [16:9 WIDE] mode
• Even if auto flashing or (Auto red-eye reduction)
is selected, the flash will not work during the
following operations:
– NightShot plus function
– [SPOTLIGHT], [SUNSET&MOON], and
[LANDSCAPE] of [PROGRAM AE]
– Manual exposure
– Flexible spot meter
• If you use the flash in bright places such as when
shooting a backlit subject, the flash may not be
effective.
• Attaching the lens hood (supplied) or a conversion
lens (optional) may cause its shadow to appear.
• You cannot use an external flash (optional) and the
built-in flash at the same time.
z Tip
• The amount of light used by the flash is adjusted
automatically. To adjust it manually, select [FLASH
LEVEL] from the (CAMERA SET) menu
(p. 66).
• When the focus is hard to adjust, refer to “Adjusting
the focus manually” (p. 40) for the proper focal
distance information.
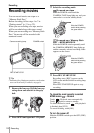
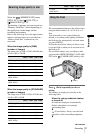
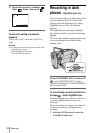
Using the self-timer
With the self-timer, you can record a still
image after a delay of about 10 seconds.
1 Touch .
2 Touch [SELF-TIMER].
If the item is not displayed on the screen,
touch / . If you cannot find it, touch
[MENU] and select it from the
(CAMERA SET) menu.
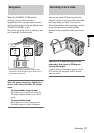
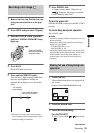
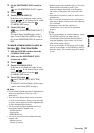
PHOTO
PHOTO
SELF–TIMER: OFF
ONOFF
60min
FINE
1600
8