


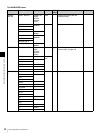
96
Menu Organization and Operation
Chapter 5 Menu Displays and Detailed Settings
2
Turn the MENU knob until the desired page appears.
3
Press the MENU knob.
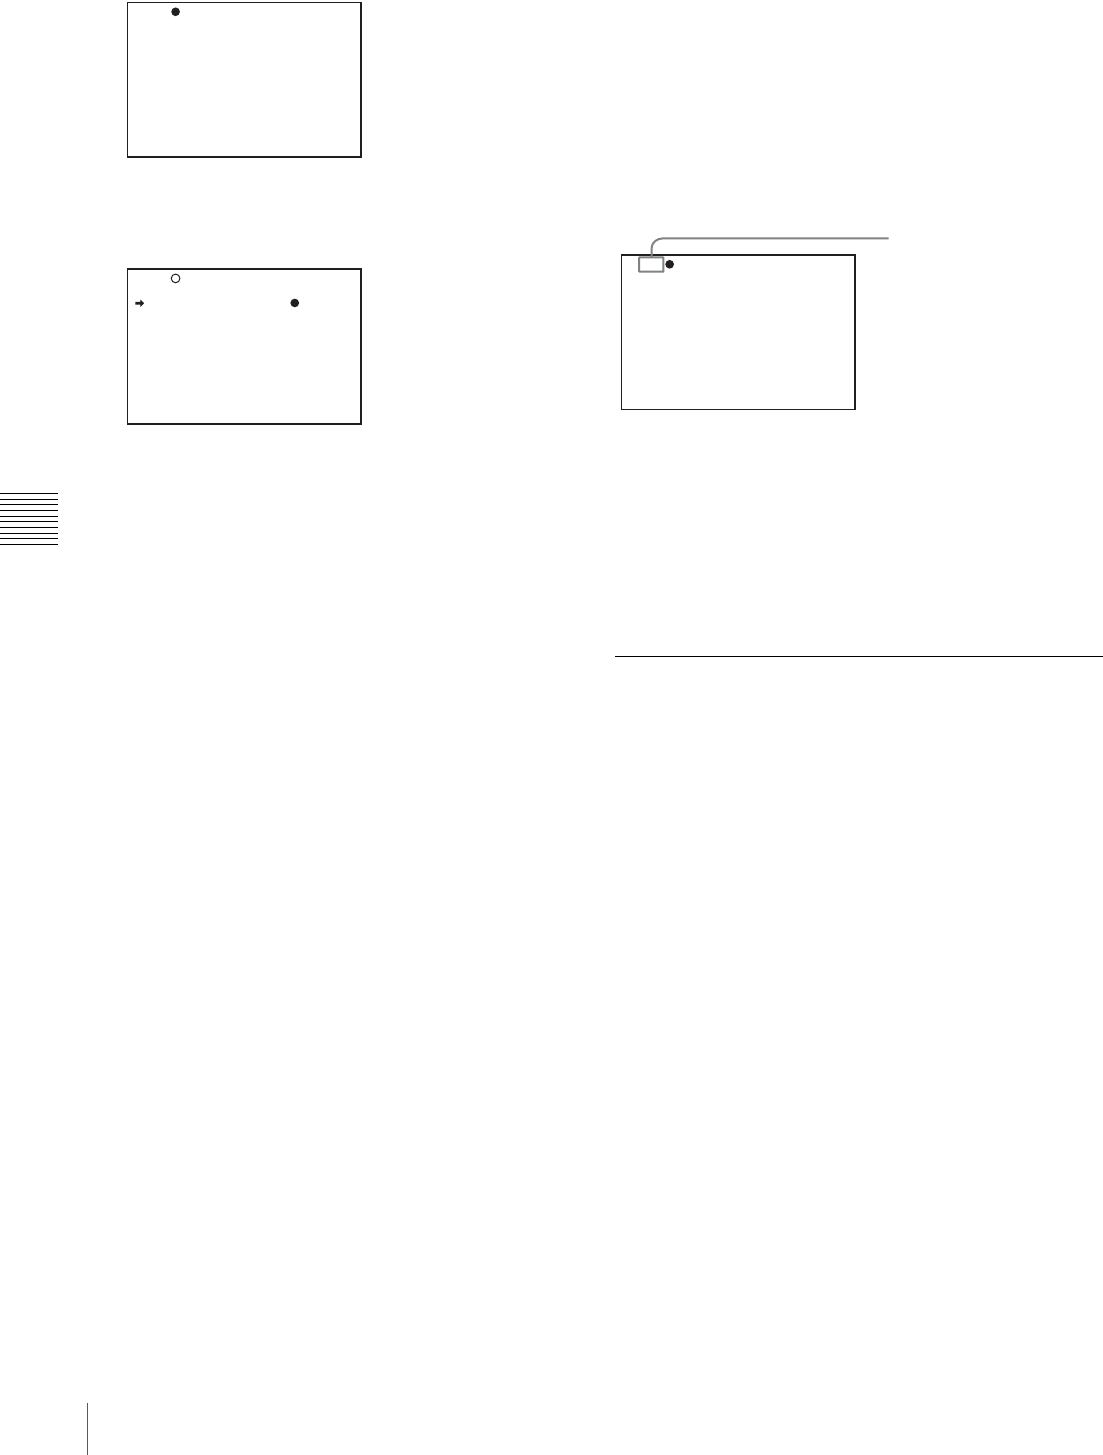
b and z appear.
4
Turn the MENU knob to move b to the desired item,
and then press the MENU knob.
b changes to z, and z changes to ?.
5
Turn the MENU knob to change the setting.
Depending on the direction of turning the knob, the
setting value increases, decreases, switches between
ON and OFF, etc.
If you want to cancel a change or return to the standard
settings, see the next item
“To cancel setting” and “To
return to the standard settings”.
To interrupt changing the settings
Flick the MENU switch to OFF.
By flicking the MENU switch to ON again, the values
that were displayed when you interrupted the setting
operations will reappear so you can continue making
settings.
6
Press the MENU knob.
z changes to b, and ? changes to z. The selection is
set.
7
To continue setting other items on the same page,
repeat steps from 4 to 6.
8
To end the menu operation, flick the MENU switch to
OFF.
The menu disappears from the screen, and the display
indicating the current status of the camcorder appears
along the top and bottom of the screen.
To cancel setting
Before pressing the MENU knob in step 6 of the above
procedure, flick the MENU switch to CANCEL.
To return to the standard settings
By pressing and holding the MENU knob in step 5 of the
above procedure, the settings return to the standard.
To move to another page
When ? appears in front of the page number
Turn the MENU knob to switch pages.
When nothing appears in front of the page
number
Turn the MENU knob to move b to the page number, and
press the MENU knob. Then Turn the MENU knob to
switch pages.
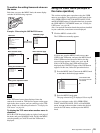
Editing the USER menu
The USER MENU CUSTOMIZE menu allows you to
configure a USER menu that consists only of pages and
items that you need by adding, deleting or replacing the
pages.
To add a new page
The USER MENU CUSTOMIZE menu allows you to add
a new page to the USER menu.
While the EDIT page contains factory-preset items, the
USER 9 EDIT to USER 19 EDIT pages are all blank in
their initial state. You can register up to 10 items, including
blank lines, on each of these pages.
1
Display the TOP menu (page 94).
2
Turn the MENU knob to move b to USER MENU
CUSTOMIZE, then press the MENU knob.
If this is the first time the USER MENU CUSTOMIZE
menu has been displayed, the CONTENTS page of the
menu appears.
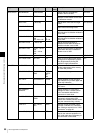
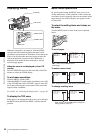
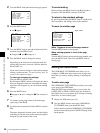
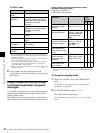
?U01 USER 1
TOP
IRIS OVERRIDE : OFF
DETAIL LEVEL : 0
MASTER BLACK : 0
BLACK GAMMA : OFF
MASTER BLK GAMMA: 0
COLOR TEMP <P> : 3200
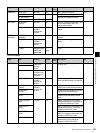
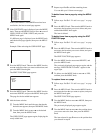
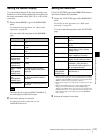
U01 USER 1
TOP
IRIS OVERRIDE : OFF
DETAIL LEVEL : 0
MASTER BLACK : 0
BLACK GAMMA : OFF
MASTER BLK GAMMA: 0
COLOR TEMP <P> : 3200
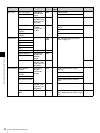
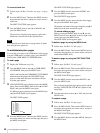
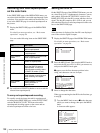
?U01 USER 1
TOP
IRIS OVERRIDE : OFF
DETAIL LEVEL : 0
MASTER BLACK : 0
BLACK GAMMA : OFF
MASTER BLK GAMMA: 0
COLOR TEMP <P> : 3200
Page number