


96
Adding audio on a recorded tape
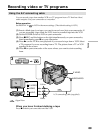
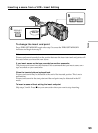
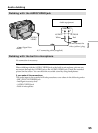
Choose a connection described on the previous pages, and connect audio equipment or
microphone to your camcorder. Then follow the procedure below.
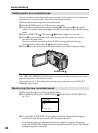
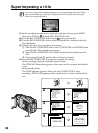
(1) Insert the recorded tape into your camcorder.
(2) Set the POWER switch to VCR on your camcorder.
(3) Locate the recording start point by pressing N. Then press X at the point
where you want to start recording to set your camcorder to the playback pause
mode.
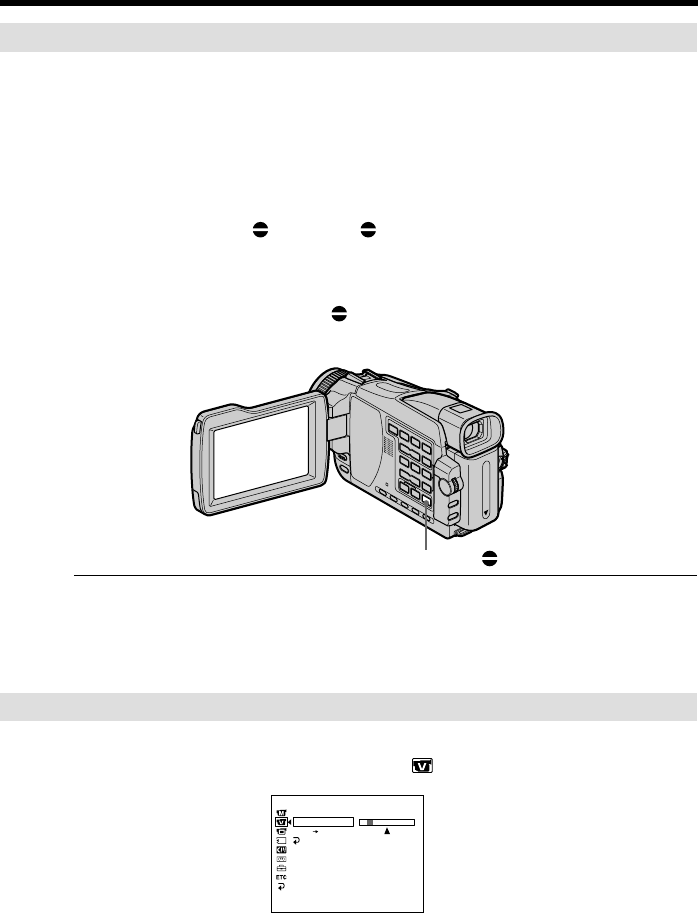
(4) Press AUDIO DUB
. The green X indicator appears on screen.
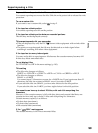
(5) Press X on your camcorder and start playing back the audio you want to
record at the same time.
The new sound is recorded in stereo 2 (ST2) during playback. During
recording new sound, the red
appears on the screen.
(6) Press x on your camcorder at the point where you want to stop recording.
To add audio more precisely
Press ZERO SET MEMORY on the Remote Commander at the point where you want to
stop recording later in the playback mode.
Carry out steps 3 to 5. Recording automatically stops at the point where ZERO SET
MEMORY was pressed.
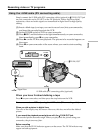
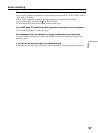
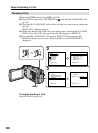
Monitoring the new recorded sound
(1) Play back the tape on which you added audio.
(2) Press MENU, then select AUDIO MIX in
with the SEL/PUSH EXEC dial
(p. 178).
(3) Turn the SEL/PUSH EXEC dial to adjust the balance between the original
sound (ST1) and the new sound (ST2), then press the dial.
Five minutes after you disconnect the power supply or remove the battery
pack, the AUDIO MIX setting returns to original sound (ST1) only. The default
setting is original sound only.
Audio dubbing
VCR SET
HiFi SOUND
AUDIO MIX
A / V DV OUT
RETURN
[
MENU
] :
END
ST1 ST2
AUDIO DUB