


85
Editing
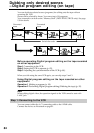
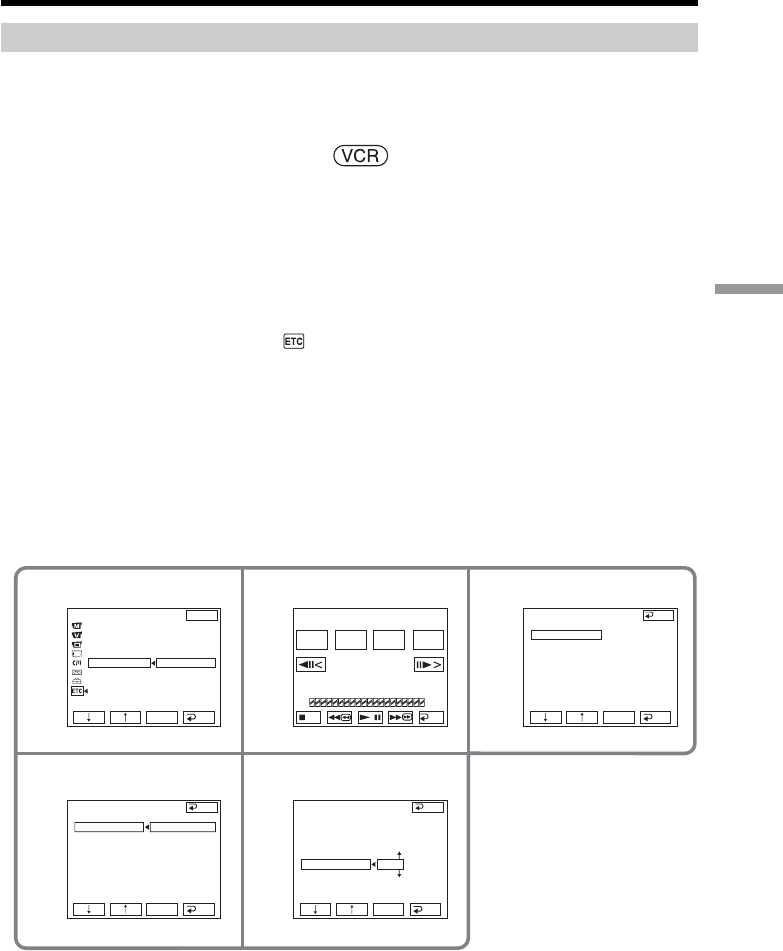
Dubbing only desired scenes – Digital program editing (on tape)
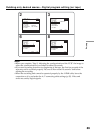
Step 2: Setting the VCR to operate
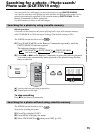
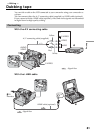
When you are connecting the camcorder and VCR using the A/V connecting cable, the
signal is emitted from the infrared rays emitter of your camcorder to the remote sensor
on the VCR to control the VCR.
The POWER switch should be set to .
Operate by touching the panel.
(1) Turn the power of the connected VCR on. If the VCR has an input selector, set
it to input.
When you connect a video camera recorder, set its power switch to VCR/
VTR.
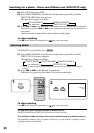
(2) Press FN to display PAGE1.
(3) Press MENU to display the menu.
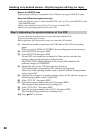
(4) Select VIDEO EDIT in
, then press EXEC (p. 185).
(5) Select TAPE, then press EXEC (DCR-TRV22/TRV33 only).
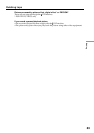
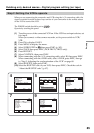
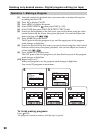
(6) Press EDIT SET.
(7) Select CONTROL, then press EXEC.
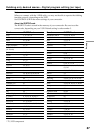
(8) When connecting with the A/V connecting cable, select IR, then press EXEC.
When connecting with the i.LINK cable, select i.LINK, press EXEC, then go
to “Step 3: Adjusting the synchronization of the VCR” on page 88.
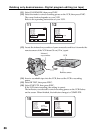
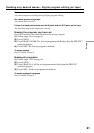
(9) Select IR SETUP, then press EXEC.
(10) Select the IR SETUP code of your VCR, then press EXEC. Check the code in
“About the IR SETUP code” (p. 87).
45
79
6
VIDEO EDI T
ED I T SET
CONTROL
ADJ TEST
”CUT
-
I
N”
”CUT
-OUT”
I
R SETUP
PAUSEMODE
I
R TEST
END
RET.
EXEC
I
R
END
VIDEO EDI T
ED I T SET
CONTROL
ADJ TEST
”CUT
-
I
N”
”CUT
-OUT”
I
R SETUP
PAUSEMODE
I
R TEST
RET.
EXEC
3
VIDEO EDI T
ED I T SET
CONTROL
ADJ TEST
”CUT
-
I
N”
”CUT
-OUT”
I
R SETUP
PAUSEMODE
I
R TEST
RET.
EXEC
I
R
i. L
I
NK
END
0:32:30:14
TOTAL
SCENE
0:00:00:00
0
V I DEO ED I T
MARK
I
N
START
ED I T
SET
UNDO
OTHERS
DATA CODE
BEEP
COMMANDER
D
I
SPL AY
V
I
DEO ED
I
T
EXIT
RET.
EXEC
RETURN
TAPE
MEMORY
END