


8
GB
3 Following the instructions as they are displayed, click Next
or Previous until the setup screen closes and display returns
to the just the Windows desktop.
z Hint
After installation is completed, a message prompting you to restart your computer
may appear. If it does, click “Yes”.
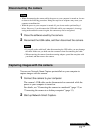
4 Connect the camera to your computer.
The necessary driver is automatically installed. If the message
prompting you to restart your computer appears, click “Yes”. After
Windows restarts, you can use the camera.
Checking that the driver is installed
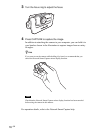
1 Connect the camera to your computer.
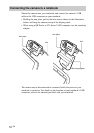
For connection details, see “Connecting the camera to a Notebook”
(page 12) or “Connecting the camera to a desktop computer” (page
13).
2 With Windows XP, click “Start”, then right-click on “My
Computer” and select “Properties”.
The “System Properties” dialog box appears. Go to Step 4.
For operating systems other than Windows XP, click “Start”,
then align the pointer with “Settings” and select “Control
Panel”.
The “Control Panel” screen appears.
3 Double-click “System”.
The “System Properties” dialog box appears.
4 Click the “Hardware” tab, and then click the “Device
Manager” button. (Depending on the operating system you
are using, you may need to click the “Device Manager” tab.
The “Device Manager” screen appears.
5 Click the plus symbol (+) to the left of “Imaging Device” on
the “Device Manager” screen.
If the “Sony Visual Communication Camera PCGA-UVC10” screen
appears, the driver is properly installed.