


5
ENGLISH
NG8060
10 Getting started (Preset mode)
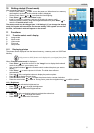
After connecting the AC/DC adaptor:
• Set the Power Switch to ‘ON’, to turn the power on. When there is no memory
card installed, the clock and the calendar mode is displayed.
• Set the Power Switch to ‘ ’, to activate the frame lighting.
• Press ‘Enter’ to enter ‘Card select’ mode.
• Install, if necessary, a memory card (see ‘8 Plugging in memory card’).
• Select the memory card by using the navigation buttons and press ‘Enter’ to
enter the ‘Function select’ mode.
The startup mode can be changed (see ‘11.6 Settings’). If you change the startup
mode, the system will search files for the new setting. If the system can not find
the files, ‘card select’ mode will appear on the screen.
11 Functions
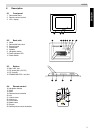
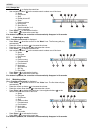
11.1 ‘Function select mode’ display
A. Image mode
B. Music mode
C. Video mode
D. File mode
E. Setup mode
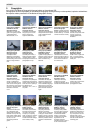
11.2 Displaying photos
The photos can be displayed from the internal memory, a memory card or a USB Flash
Memory.
When ‘Function select mode’ is displayed:
• Press ‘Enter’ when the cursor is on the ‘Image’ icon to display the thumbnail
mode of the photos in your memory card.
• Use navigation buttons on the remote control to select the photo you want to
display.
• Press ‘Enter’ to see the picture in full size. The slide show will start
automatically.
• Press of the navigation buttons to display the previous photo.
• Press to display the next photo.
• Press the rotate button or to rotate the picture clock or counter clockwise.
• Press the zoom button to zoom in. During zoom, press the navigation keys to shift the picture.
11.2.1 Brightness
• Press to activate the brightness bar.
• Press or to change the brightness.
• Press ‘ESC’ to remove the brightness bar.
11.2.2 Volume
• Press of the navigation buttons to activate the volume bar.
• Press or to change the volume.
• Press ‘ESC’ to remove the volume bar.
Only pictures in JPEG format can be displayed in your digital photo frame.
11
11
17
17
A
B
C D E
17
16
17
16
16
19 26
23 16
16
16 16
25
16
16 16
25