


7
ENGLISH
NG8060
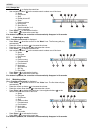
11.5 File manager
When ‘Function select mode’ is displayed:
• Press ‘Enter’ when the cursor is on the ‘FILE’ icon.
• Use navigation buttons to move through the directories:
– / to scroll through the directory
– to enter the directory
– to exit the directory
• Select the target file and press . A sign will appear on the left of the
selected file's name.
• To unselect the file press again. You can select more that one files with the previous step.
• Press the info button to open the action menu.
To delete the selected files:
• Press to select the 'Trash' icon.
• Press ‘Enter’ to confirm.
• To turn back to the file menu, press ‘Enter’ again.
• Exit the current folder by pressing or ‘ESC’
To copy the selected files when the action menu is displayed:
• Exit the current folder by pressing or ‘ESC’ and enter to the target folder.
• Press ‘Info’ and move the cursor on to the 'Copy' icon by .
• Press ‘Enter’ to copy the selected files to the target folder.
• Press ‘Enter’ again to turn back to the file menu.
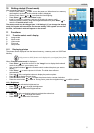
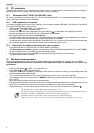
11.6 Settings
• Select the ‘Setup’ icon by using the navigation buttons in the ‘Function select mode’.
• Press ‘Enter’ , the setup menu is displayed.
Select on of the next settings by using the navigation buttons and press ‘Enter’ :
1. Language Setting
– Select the desired language (English, German, French, Italian,
Spanish, Dutch, Portuguese and Turkish) and press ‘Enter’
.
2. Picture Setting.
– Use navigation buttons to select ‘Slideshow Model’ or
‘Picture Play Mode’ and press ‘Enter’ .
– Select one of the settings and press ‘Enter’ to confirm.
3. Clock setting
– Use or to move the cursor on date and clock.
– Use and to change the date and the clock.
4. Alarm setting
– Move the cursor with or to select the item to be set
(hour/date/number of rings and mode).
– Change the settings with and . There are three rings.
The mode can be set as OFF/once/day.
5. Start up mode
– Use and to select the start up mode (Calendar/
Picture/Music/Movie/Picture+Music).
6. Video Setting:
– Use and to select Brightness, Contrast or Saturation.
– Use or to change the value (0 to 16).
7. Bluetooth Setting:
– Press ‘Enter’ to open the bluetooth setting menu.
– Use and to select ‘ON’ or ‘OFF’
8. Default Setting:
– Press ‘Enter’ to reset the digital photo frame to the factory
setup.
9. Version
– Press ‘Enter’ to see the software version.
17
16
16
16
16
16
16
19
16
17
17
16
25
16
25
19 16
17
17
16
17
17
17
17
17
16 16
16
16
16
16
16
16 16
17
16
17
17