12
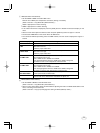
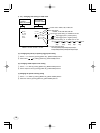
MANUAL : It is possible to select the exposure time from eleven speed setting; OFF, 1/100s, 1/250s,
1/500s, 1/1000s, 1/2000s, 1/4000s, 1/10000s, 1/25000s, 1/50000s, 1/100000s.
Note:
When setting a rapid shutter speed, sensitivity degrades according to the speed.
When a discharging light such as fluorescent lamp, etc. is used for the illumination,
the flicker may be large.
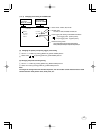
SS : Shutter speed can be set by the double horizontal scanning time (2H) unit or by the frame
unit.
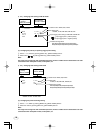
E.TRG : Exposure is performed and images are output by external trigger. E.TRG includes the four
modes described below. (For details of specifications, refer to the item “7.4 E.TRG
(External trigger)”.)
• 1P SNR (1 Pulse Sync Non Reset)
The charge begins to accumulate after the trigger pulse is received, and 1 frame images
are output according to the internal vertical sync signal timing. The exposure/accumula-
tion time can be set from 0.01 to 50 ms. The trigger signal timing can be set to either the
rising or falling edge.
• 1P SR (1 Pulse Sync Reset)
The charge begins to accumulate after the trigger pulse is received. Upon completion of
accumulation the vertical sync signal is reset and 1 frame images are output. The
exposure/accumulation time can be set from 0.01 to 50 ms. The trigger signal timing can
be set to either the rising or falling edge.
• PW SNR (Pulse width trigger Sync Non Reset)
The charge begins to accumulate after the trigger pulse is received, and 1 frame images
are output according to the internal vertical sync signal timing. This is the mode to set
the exposure period by the pulse width of the trigger. The trigger signal polarity can be
set to either the positive or negative polarity.
• PW SR (Pulse width trigger Sync Reset)
The charge begins to accumulate after the trigger pulse is received. Upon completion of
accumulation the vertical sync signal is reset and 1 frame images are output. This is the
mode to set the exposure period by the pulse width of the trigger. The trigger signal
polarity can be set to either the positive or negative polarity.
• RR (Reset restart)
Input of an external reset-restart signal permits one screen of information to be output
at an arbitrary timing.
7. 2 Menus
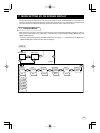
• Select the menu to change the setting by referring the item "7.1 Using the Menus".)
• When the [MENU UP], [MENU DOWN] buttons are pushed, the "→" on the screen moves up and down.
Move the "→" to the item to change.
Note:
When performing the mode setting in the menu display while selecting ON in "PART" (refer to page 29)
and E.TRG in "MODE", the display shows normal mode and then the camera returns the setting mode.
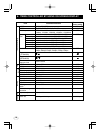
( 1 ) SHUTTER (Electronic shutter)
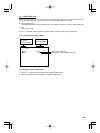
The electronic shutter has three modes; MANU (Manual), SS (Synchro. Scan), E.TRG (External trigger).
Set the "→" to "MODE" and push [DATA UP], [DATA DOWN] button to select the desired mode among "MANU",
"SS", "E.TRG".


