Step 2: Configure the adaptor by connecting it to
the hub, switch, or router and doing the
following:
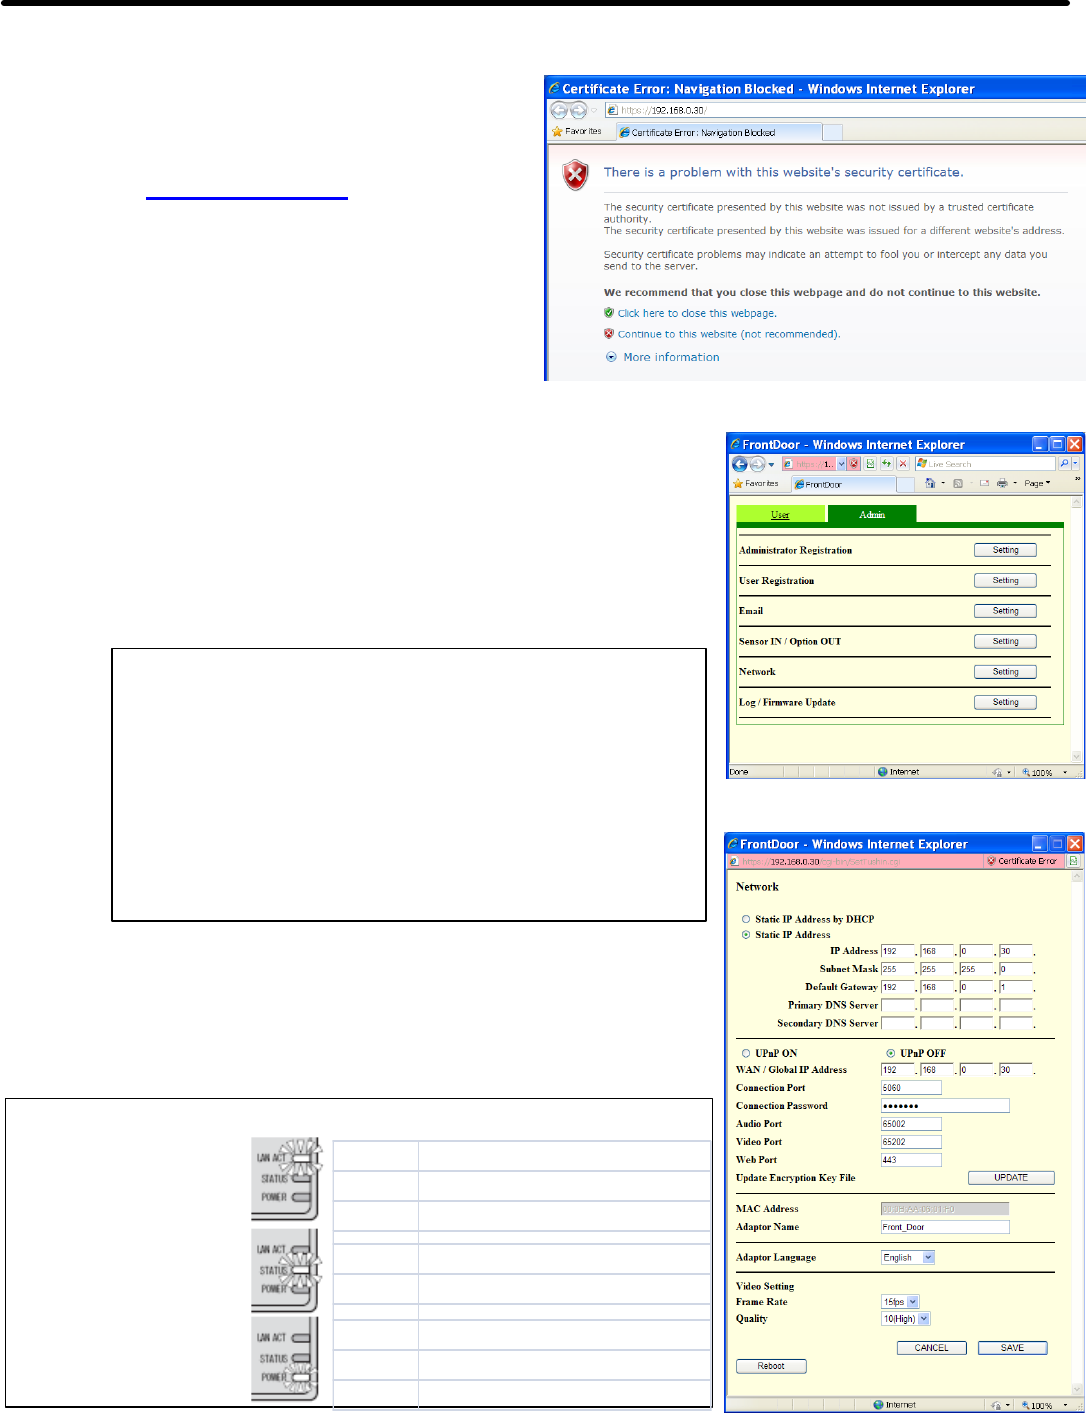
a. Open a web browser and point the address
bar to https://192.168.0.30 and hit Enter
b. Click [OK] or [YES] for the any Security Alert
messages (the wording will vary see Figure 1
to the right “Certificate Error”), then use the
default Admin ID “aiphone” and Password
“aiphone” at the login prompt
c. Click the Admin tab and click on the [Setting] button next to
Network (see Figure 2 to the right “Web Interface, Admin tab”)
d. Change the IP address, subnet mask, and default gateway.
Turn OFF UPnP and specify the WAN / Global IP address to
be the same as the IP address field above (this is considered
the 'Public' IP Address for the adaptor, in most networks it will
be the same as the adaptor's 'Local' IP address).
e. Optional changes:
o Add a Primary DNS Server if using the email feature.
o When using network masquerading (or IP
masquerading), specify the WAN / Global IP Address
to be the Public IP Address for the adaptor and change
the Connection, Web, Audio or Video ports as directed
by the network administrator.
o Change Adaptor Name and note that the "_" character
can be used to create a space in the software's
adaptor list.
f. Click the [Save] button and then the [OK] button to restart the
adaptor. The adaptor will power on with the new settings.
Repeat these steps with the next adaptor until every adaptor has
a unique IP address and valid subnet mask.
Pg. 4
5 HARDWARE CONFIGURATION
Figure 2: Web Interface Admin tab
Figure 3: Network settings
Figure 1: Certificate Error
Lit Normal
Blinking Acquiring IP
Off Bad physical network connection
Lit Normal
Blinking Starting up, seeking JK Master
Lit On
Blinking No JK Master detected
Off Off
Status lights on JKW-IP
Note: Changes to the
adaptor in Step 2 a-f
can be made as long
as the LAN ACT light
is lit solid.
Intercom functions will
not work until system
is wired per the
diagram on page 2.


