Step 4: Register each adaptor with the JKW-IP software.
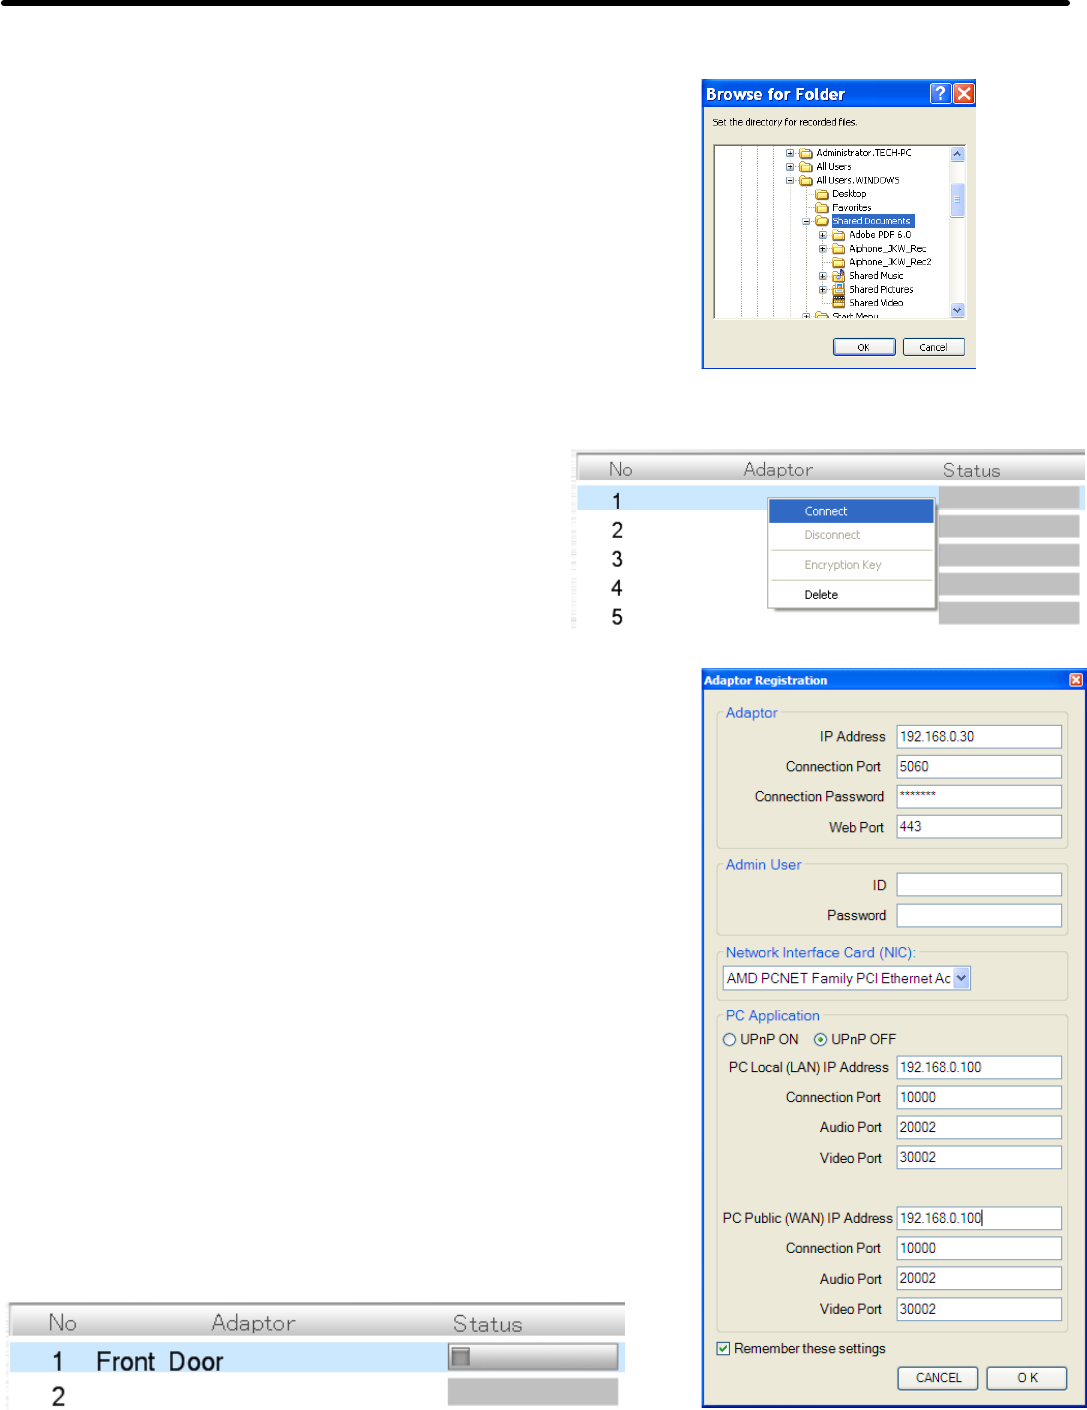
Right-click an empty slot in the Adaptor display and
choose Connect from the drop down menu (see Figure 5
to the right “Right click drop down menu”).
This will open the Adaptor Registration window (see
Figure 6, to the right “Adaptor Registration”).
a. In the Adaptor box, enter:
o IP address of the adaptor (or WAN IP
address if one was specified in step 2)
o Connection Port (if changed in step 2)
o Connection Password (default is “aiphone”)
o Web Port (if changed in step 2)
b. In the Admin User box, enter Admin or User ID and password
(defaults for Admin ID are both “aiphone”).
c. In the Network Interface Card: NIC box, select the wired or
wireless network interface card that connects the PC to the
network containing this JKW-IP adaptor.
d. In the PC Application box, leave UPnP ON unless using a
network with NAT or IP Masquerading. If UPnP is turned off,
enter the following for incoming data to use:
o PC Local (LAN) IP address and any 3 ports not blocked by
any firewall and not used by any other adaptor registered
to this PC.
o PC Public (WAN) IP Address and ports should be the
same as the above unless the network admin says
otherwise.
Click [OK] and repeat step 3 for each computer and 4 for each
adaptor. Each adaptor‟s name should appear on the list for the slot
registered, and a status icon indicates the adaptor is ready to use.
Pg. 5
6 SOFTWARE CONFIGURATION
Figure 6: Adaptor Registration
Step 3: Install JKW-IP software on an Admin or User PC, using
the supplied CD or download it from http://www.aiphone.com
Follow the prompts during installation. The exact
prompts will vary depending on the existing software on the PC.
When you see the “Browse for Folder” window, specify a valid folder
to save recorded files to, such as Shared Documents (see Figure 4
to the right “Saved Recordings”).
After installation is complete, launch the program.
Figure 4: Saved Recordings
Figure 5: Right click drop down menu
Figure 7: Status Icon
