


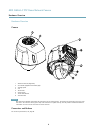


AXIS Q6044-C PTZ Dome Network Camera
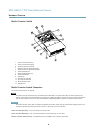
Accessing the Product
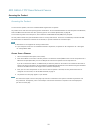
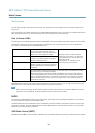
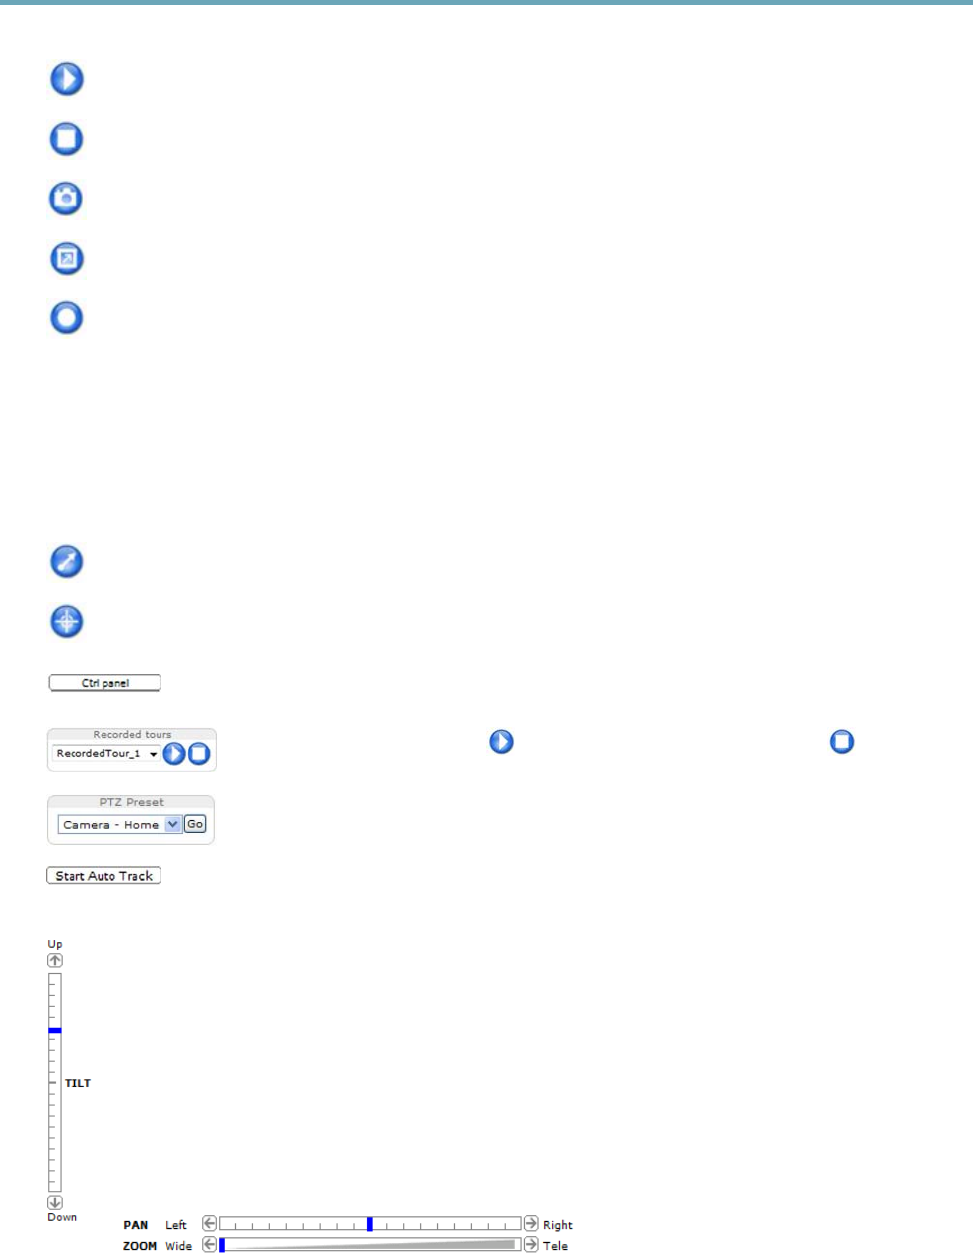
The Play button connects to the Axis product and starts playing a media stream.
The Stop button stops the media stream.
The Snapshot button takes a snapshot of the video image. The location where the image is saved can be specied
in the AMC Control Panel.
Click the View Full Screen button and the video image will ll the entire screen. Press ESC (Escape) on the computer
keyboard to cancel full screen view.
The Record button is used to record the current video stream. The location where the recording is saved can be specied in
the AMC Control Panel. Enable this button from Live View Cong > Viewer Settings.
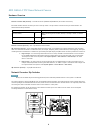
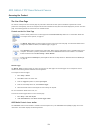
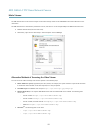
PTZ Controls
The Live View page also displays Pan/Tilt/Zoom (PTZ) controls. The administrator can enable/disable controls for specied users under
System Options > Security > Users.
With the PTZ Control Queue enabled the time each user is in control of the PTZ settings is limited. Click the buttons to request or
release control of the PTZ controls. The PTZ Control Queue is set up under PTZ > Control Queue.
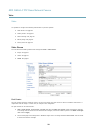
Click the Emulate joystick mode button and click in the image to move the camera view in the direction of the
mouse pointer.
Click the Center mode button and click in the image to center the camera view on that position. The center mode
button could also be used to zoom in on a specic area. Click in the image and drag to draw a rectangle surrounding
the area to be magnied. To zoom out, rotate the mouse wheel.
Click the Ctrl panel button to open the PTZ control panel which provides additional PTZ controls.
User-dened buttons can also appear in the Control panel. See Controls, on page 33.
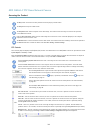
Select a recorded tour and clickto play a previously recorded tour and clickto stop. See
Tour Recording, on page 31.
Select a PTZ preset position to steer the camera view to the saved position. See Preset Positions,
on page 29.
Click the Start Auto Track button to start autotracking directly from the Live View page. See
Autotracking, on page 30.
Pan and Tilt bars – Use the arrows to pan and tilt the camera view, or click on a position on the bar to steer the
camera view to that position.
Zoom bar – Use the arrows to zoom in and out, or click on a position on the bar to zoom to that position.
Focus bar – Use the arrows to focus the camera, or click on a position on the bar to set the focus position. Using the
focus bar will disable the product’s autofocus. To re-enable, use the PTZ control panel which is opened by clicking
the Ctrl panel button (see above).
Iris bar – Click on a position on the iris bar to change the degree to which the iris is opened. This will disable the
product’s auto iris. To re-enable, use the PTZ control panel which is opened by clicking the Ctrl panel button (see above).
Brightness bar – Click on a position on the brightness bar to adjust the image brightness. This setting will not be saved.
To make a saved change, go to Setup > Video > Camera Settings > Brightness and adjust the brightness.
14