21
15 Basic Operations
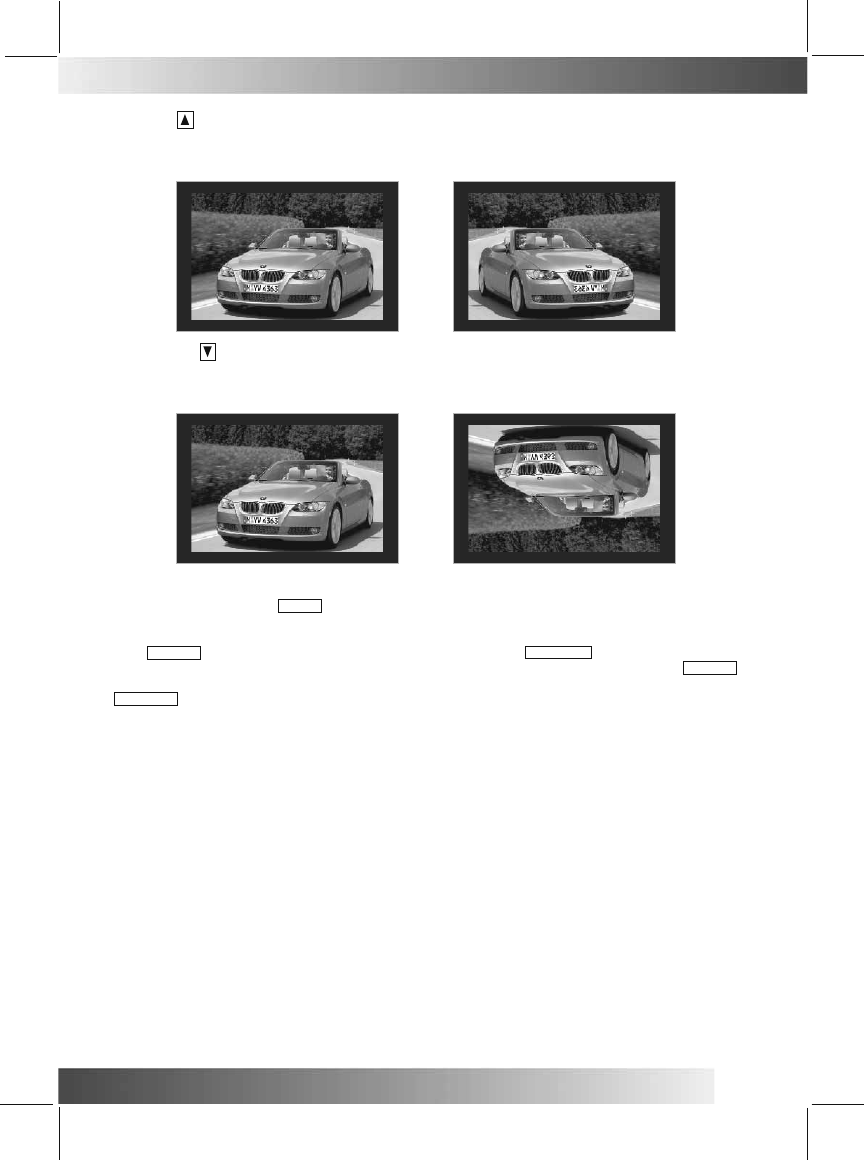
The up button on the remote control can be used to [flip horizontally], resulting in an image with
left and
right sides reversed. As shown in the figure below, the front of the car switches from to , and
the
entire image
has been reversed from left to right, but the vertical sides do not change, the top of
the car is still
on top.
Flip Horizonta
Flip Verticall
The down button on the remote control can be used to [shift vertically], resulting in an image
that is reversed in
terms of top and bottom sides. As shown in the figure below, the top of the car was
originally
on top, but ends up on the bottom. But the left and right sides of the car are not changed,
the
front of the car is still pointing towards the left.
JPG Browse Mode:
Media Manager:
When the user inserts a storage device such as a portable drive or SD card, after the system
analyzes the file format, the user will be able to conduct playlist management through the File
Manager. The recognizable multimedia file types include: JPEG, MP2, MP3, WMA, DAT, MPG,
VOB, and MP4.
The window on the left of the File Manager is used to manage the folders inside the storage
medium. The window on the right displays the files inside the particular folders.
When viewing images, press STOP and the system will enter the browse mode. After the system
enters the [Thumbnail mode], fifteen 3x5 thumbnail clips will appear, making it easy for the user
To view the images in the folder directory. After selecting the images that you wish to view, you
can press to enter the Slide Show mode. After pressing RETURN , the user can select to ENTER
the Rotate function, and then select the image that they wish to rotate and then press ENTER
Rotate the selected image 90 degrees to the right. After the image has been rotated, you can
press RETURN to return to the browse mode, or you can select the Reset function to cancel
all rotation actions.
Connecting to your PC:
Connecting the Photo Frame to your PC
If your PC is running Windows XP or later version this photo frame does not require a driver. When it is
connected to your PC it will appear as a mass storage device (Removable Disk).
The following procedure is an example based on a PC running Windows XP. It assumes that your PC
is already powered on. the photo frame is in Main menu.
1. Select storage device you want to connect to PC in setup menu(Please refer to••4.3.4••)
2. Using a USB cable (not supplied), connect the USB Mini B (smaller) end to the "PC" connector on the
photo frame. Then connect the USB A (larger) end to your PC.
3. When connected successfully, "Connected to PC" will blanking on the display of the photo frame.
4. It is ready to transfer file in the same way as any removable disk.
5. Once the files have been transferred, wait for a few seconds before disconnecting your photo frame
from your PC in the same way as any removable disk.


