


8
In the above three modes the OFF mode is the specied safe mode when
any actions must be taken, e.g., replacing the SD-card or batteries, or
transporting the device.
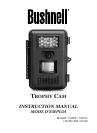
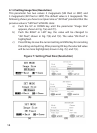
Entering into the ON (Live) mode: After turning on the BUSHNELL TROPHY
CAM , it will enter into the ON mode. The motion indication LED (red) will
blink for about 10s. This time interval is for you to make the BUSHNELL
TROPHY CAM ready for operation, e.g., to close the front cover and to
lock it. After entering into the ON mode, no manual controls are needed
or possible. The BUSHNELL TROPHY CAM will take pictures or videos
automatically according to the previous programmed settings, when
activity is detected in the monitoring region.
If the device was previously in the SETUP mode, you just need to slide the
switch to the ON position.
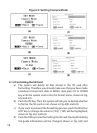
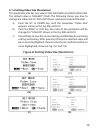
3.5 Activating the LCD screen and Entering into the SETUP Mode
Entering into the Setup (Test) mode: Anytime in the SETUP mode,
the SETUP mode is activated by moving the slide switch to the SETUP
position (If a picture or a video is just being taken, this action will be
nished rst).
Under the Setup mode you can change the settings of the BUSHNELL
TROPHY CAM manually or set operational parameters with the help of
the built-in LCD or an external TV monitor.
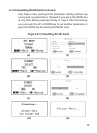
3.6 Manual Capture
Under the SETUP mode, you just need to aim at the object, and then press
the SHOT key. A few seconds later, you’ll get a picture saved in the SD-
card. The number of pictures and video clips at the bottom of the LCD
will increase by one.
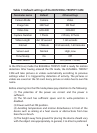
3.7 Default Settings and Live Monitoring
When the BUSHNELL TROPHY CAM leaves the factory, most parameters
are set as default. Please refer to table 1.
3.4 Powering on and Entering into the ON (Live) Mode (continued)