


132 External Connections
Preparations
Install the software before you connect the camcorder to the computer
for the first time. (Windows users only: you also need to select Camer-
aWindow's auto-launch setting.) After that, just connect the camcorder
to the computer (steps 2 and 3) and proceed directly to transfer the
photos (
133).
1 Install the software on the supplied DIGITAL VIDEO Solution
Disk CD-ROM.
Refer to the installation guide (separate leaflet included with the
CD-ROM).
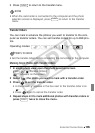
2 Set the camcorder to mode, in single photo view.
Select the photos in the built-in memory or on the memory card
( 52) and move the zoom lever toward T to return to single photo
view.
3 Connect the camcorder to the computer using the supplied USB
cable.
•Connection . Refer to Connection Diagrams ( 123).
• If the device type selection screen appears, select [Computer/Printer]
and press .
• The direct transfer menu appears on the camcorder screen and the
button lights up.
First-time connection to a computer running Windows
Windows users only: The first time you connect the camcorder to the
computer, you also need to select the CameraWindow auto-launch
setting.
Refer to Starting CameraWindow.
IMPORTANT
• While the camcorder is connected to the computer, do not open the
memory card slot cover and do not remove the memory card.
• Observe the following precautions while the ACCESS indicator is on or
flashing. Failing to do so may result in permanent data loss.
- Do not open the memory card slot cover.
- Do not disconnect the USB cable.
- Do not turn off the camcorder or the computer.
- Do not change the camcorder’s operating mode.
4
DVSD
C OPY