27
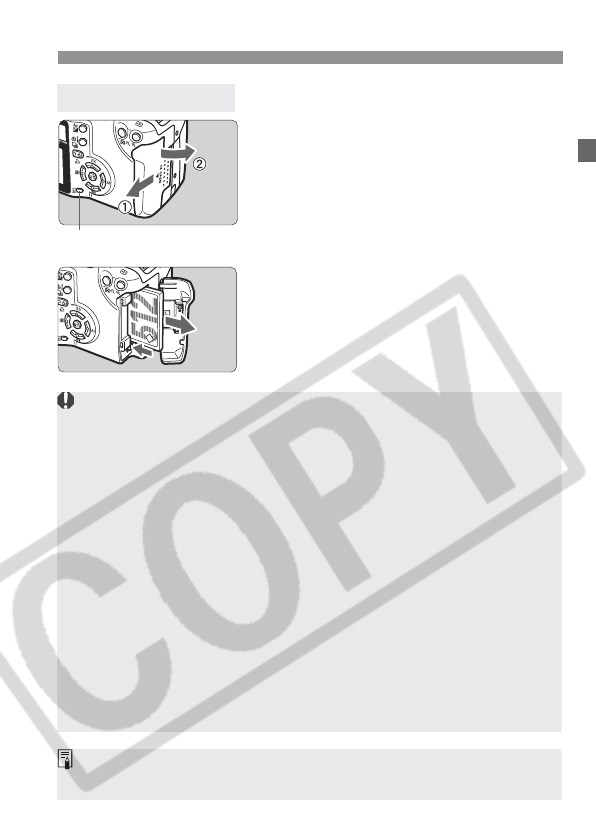
Installing and Removing the CF Card
1
Open the cover.
¡ Set the Power switch to <2>.
¡ Check that the “buSY” message is
not displayed on the LCD panel.
¡ Make sure the access lamp is off,
then open the cover.
2
Remove the CF card.
¡ Press the Eject button.
s The CF card will be ejected.
¡ Close the cover.
Removing the Card
Access lamp
¡ A blinking access lamp indicates that data is being transferred or
read, written, or erased on the CF card. Never do the following while
the access lamp is lit or blinking. Such actions may destroy the
image data. It may also damage the CF card or camera.
• Shaking or banging the camera around.
• Opening the CF card slot cover.
• Removing the battery.
¡ If you use a CF card already containing recorded images, the images
recorded thereafter by the camera might be appended with a file number
that continues on from the images already recorded on the CF card.
If you want to start the file numbering from 0001, set [Auto reset] for the
file numbering (p.67), then use a newly formatted CF card.
¡ If “Err CF” (Error CF) is displayed on the LCD panel, see page 118.
¡
If you use a low-capacity CF card, it might not be able to record large images.
¡ Compared to CF cards, Microdrive cards are more vulnerable to
vibration and physical shock. If you use a Microdrive, be careful not to
subject the camera to vibration or physical shock especially while
recording or displaying images.
On the menu, if you set the [cShoot w/o card] to [Off], it will prevent you
from shooting without a CF card. (p.41)


