3. SETUP
Lamp
You will need to install a lamp prior to the initial operation of the fixture. A 150W HTI lamp is included.
Warning! When replacing the lamp, please wait 15 minutes after powering down to allow the
unit to cool down! Always disconnect from main power prior to lamp replacement.
Do not touch the envelope (glass area) of the bulb with bare hands. If this happens, clean the lamp
with alcohol and wipe it with a lint free cloth before installation.
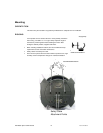
Lamp Replacement
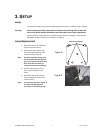
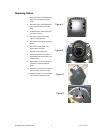
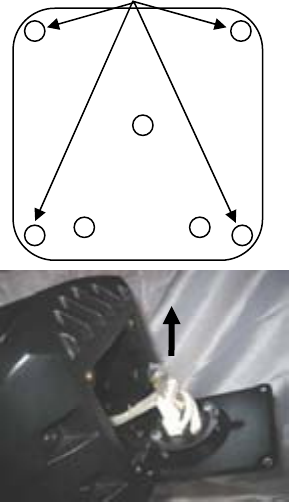
Figure A
Figure B
Lamp Access Screws
1) Remove the four screws indicated in
Figure A to access the lamp.
2) Hold the lamp with a lint-free cloth,
and pull the lamp directly
out of the
socket as shown in Figure B.
Note: One lead of the lamp is larger than
the o
ther. Make sure the large lead
goes in the large socket. If the lamp
won’t insert into the socket, try
turning it around and reinserting it.
3) Hold the new lamp with a lint-free
cloth, and insert directly
into the
socket.
4) Reinsert the lamp housing into the
fixture, an
d tighten the four screws
removed in step 1.
Note: The lamp may need to be aligned. If
so, follo
w the lamp alignment
procedures on the following page.
Intimidator Spot 2.0 HTI Manual 7 2007-01-24/09:36


